Ducati Diavel Owners Manual: Trip 2 meter
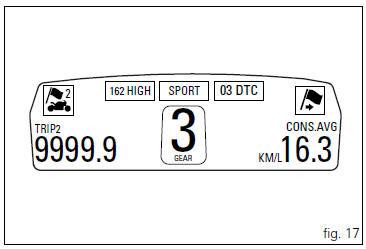
This function shows the distance travelled since the trip meter was last reset (in km or miles depending on the specific application).
Holding the button (1, fig. 14) ?
pressed for 3 seconds
when this function is displayed resets the trip meter.
When the reading exceeds 9999.9, Distance travelled is reset and the meter automatically starts counting from 0 again.
If the system measurement units are changed at any moment through the "set units" function of the setting menu, or if there is an interruption in the power supply (battery off), the distance travelled is reset and the count starts from zero (considering the newly set unit of measurement).
 Trip 1 meter
This function shows the distance travelled since the trip
meter was last reset (in km or miles depending on the
specific application).
Holding the button (1, fig. 14)
pressed for 3 seconds
wh ...
 Distance travelled on fuel reserve: trip fuel
This function shows the distance travelled on fuel reserve (in
km or miles depending on the specific application).
When the fuel light comes on, the display automatically
switches to the "tr ...
Other materials:
Changing the engine oil and filter cartridge
Note
This operation has to be carried out with hot engine (but turned off)
because the oil in these conditions is more fluid and
its evacuation is faster and complete.
Remove the drain plug (3) with seal (a) from the oil sump and allow the oil
to drain off.
Warning
Dispose of oil and/or fil ...
Identification data
All ducati motorcycles have two identification numbers, for
frame (fig. 1) And engine (fig. 2).
Note
These numbers indicate the motorcycle model and
should be quoted when ordering spare parts.
...
Reassembly of the tool tray
Place the tool tray unit (23) on the lateral brackets (2) and (3) by
tightening the screws (24) to 14 nm +/- 5% (sect. 3-3,
Frame torque settings).
If the handle guide (32) has been previously removed, position it on the tray
(23) and tighten the screws (34) to 20 nm
+/- 5% (sect. 3-3, Fram ...