
Ducati Diavel Service Manual: Abs disabled information not displayed
Fault codes
Dds: displays a fault code described in the description of the abs system.
Dashboard: no fault code displayed.
Wiring diagram
Checks
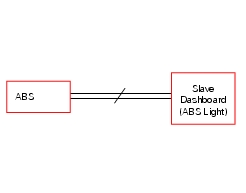
The abs fault indicator indicates the occurrence of one or more faults in the antilock brake system, or if the system itself has been disabled by the rider, using the relative control. The signal causing activation of the abs fault indicator when the antilock brake system is disabled, comes directly from the abs unit, and the information is transmitted over the can line by the bbs unit, so that it may be acquired by the dashboard, where the indicator itself is located.
Diagnose the abs unit.
Check the integrity of the electrical circuit and connections (short circuits to ground, short circuits to vdc, open circuits).
If the above test did not identify the problem, contact ducati.
Note
Check integrity of electric circuit - short-circuit to vdc = with dashboard on, using a voltmeter, a voltage is measured between the wire tested and ground.
Check integrity of electric circuit - short-circuit to ground = with the battery cables disconnected, using an ohmmeter, continuity is detected between the wire tested and ground.
Check integrity of electric circuit - open circuit = with the battery cables disconnected, using an ohmmeter, no continuity is detected between the two ends of the wire tested.
 Abs fault indicator not working
Fault codes
Dds: displays a fault code described in the description of the abs system.
Dashboard: no fault code displayed.
Wiring diagram
Checks
The abs fault indicator indicates the occurr ...
 Stop light not working
Fault codes
Dds: stop light diagnosis -> stop light error (generic stop light malfunction
indication).
Dashboard: the error "stop light" is shown on the service display. The eobd
warning li ...
Other materials:
Removal of the brake discs
The front brake discs consist of an inner carrier, which is mounted to the
wheel, and an outer rotor. Both parts must be
changed together as a pair.
Remove the front wheel (sect. 7 - 1, Removal of the front wheel).
Undo the retaining screws (5) of the disc to the wheel, remove the disc (7) ...
Side stand button
Introduction
The side stand button is located on the side stand. Together with the signal
from the clutch button and the neutral signal
generated by the gear sensor (transmitted to the engine control unit over the
can line), the side stand position signal is
used to enable or disable engine s ...
Fuel system circuit
The fuel system circuit consists of:
An electric pump, driven by the injection relay, which is in turn
controlled by the ecu (engine control unit)
A fuel filter
A pressure regulator
Two injectors (one per cylinder, located downstream of throttle valve)
The plastic mounting shown in t ...