
Ducati Diavel Service Manual: Adjusting the clutch lever and front brake lever
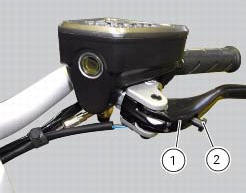
The clutch lever (1) is fitted with a span adjuster (2) which serves to alter the distance of the lever from the handlebar.
The lever distance can be adjusted through 10 clicks of the dial (2). Turn clockwise to increase lever distance. Turn the adjuster counter clockwise to decrease lever distance.
When the clutch lever (1) is operated, drive from the engine to the gearbox and the drive wheel is disengaged. Correct use of the clutch lever is very important in all riding situations, especially when moving off.
The position of the front brake lever (3) can be adjusted in the same way.
Warning
Any adjustment of clutch and brake levers must only be carried out when motorcycle is stationary.
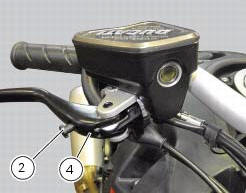
 Adjusting the throttle cable
The throttle grip in all steering positions must have free play, measured on
the periphery of the flange of the grip, of 1.5 -
2.0 Mm.
If necessary, adjust using the adjusters (1) and (2) loca ...
 Adjusting the position of the gear change and rear brake pedals
The position of the gear change and rear brake pedals in relation to the
footrests can be adjusted to suit the preferred
riding position.
To modify the gear change pedal position act in the foll ...
Other materials:
Description of the diagnosis instrument (dds)
The "dds" diagnostic system lets you diagnose any faults in the
injection-ignition system via a serial port. The system is
also equipped with functions to test various devices on the motorcycle. The dds
diagnosis instrument can be used to
measure current and voltage on any electrical device, t ...
The hands free module
Introduction
The hands free module incorporates the control unit communicating with the
other nodes on the motorcycle, the on/off
button, the microswitches detecting full lock steering angle (for enabling
steering lock engagement) and the steering lock.
The module is sealed and its individu ...
Trip 1 meter
This function shows the distance travelled since the trip meter was last
reset (in km or miles depending on the specific
application).
Press and hold (1) "s" for 3 seconds while in this function to reset the trip
odometer.
When the reading exceeds 9999.9, Distance travelled is reset and t ...