Ducati Diavel Service Manual: Distance travelled on fuel reserve: trip fuel
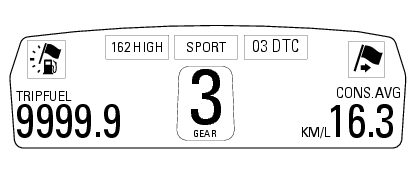
This function shows the distance travelled on fuel reserve (in km or miles depending on the specific application).
When the fuel light comes on, the display automatically switches to the "trip fuel" indicator.
Trip fuel reading remains stored even after key-off until the vehicle is refuelled.
Count is interrupted automatically as soon as fuel is topped up to above minimum level.
When the reading exceeds 9999.9, It is reset and the count restarts automatically.
 Trip 2 meter
This function shows the distance travelled since the trip meter was last
reset (in km or miles depending on the specific
application).
Press and hold (1) "s" for 3 seconds while in this function ...
 Indicator cons. Avg - average fuel consumption
This function indicates the "average" fuel consumption.
The calculation is made considering the quantity of fuel used and the km
travelled since the last trip 1 reset. When trip 1
is reset, the ...
Other materials:
Absolute pressure sensors
Introduction
The engine control system of the diavel is equipped with two absolute
pressure sensors, with one connected to the intake
duct of each cylinder (map 1 cylinder 1 - horizontal - map 2 cylinder 2 -
vertical). They are used by the control unit to
determine the quantity of fuel to be ...
Adjusting the throttle cable
The throttle grip in all steering positions must have free play, measured on
the periphery of the flange of the grip, of 1.5 -
2.0 Mm.
If necessary, adjust using the adjusters (1) and (2) located on the steering
tube on the right side of the motorcycle.
Adjuster (1) adjusts the throttle o ...
Refitting the primary drive gears and checking backlash
Fully degrease the crankshaft splined end and the corresponding spline on the
primary drive gear.
Position the spacer (c) onto the crankshaft.
Fit the driving gear (b) onto the crankshaft with the oil pump drive sprocket
facing the crankcase.
Temporarily secure the gear with the was ...