Ducati Diavel Owners Manual: Key-on/key-off using the pin code (immobilizer release)
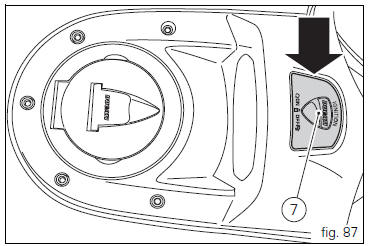
Key-on can be performed by pressing the button (7) on the hands free lock (1, fig. 77) Without the presence of the keys (3, fig. 77) And (4, fig. 77) And entering the pin code on the dashboard.
Key-off can be performed by pressing the button (6) on the handlebar / hands free key (7) / engine off no key.
After each key-off, at the next key-on if the key is not present the pin code must be entered.
The pin code is entered by the customer when receiving the motorcycle.
The function is not enabled without the pin code.
When the hands free button is pressed (7) the instrument panel activates the backlighting and the circular display to be able to enter the four digit pin code. Entering the correct pin turns on the instrument panel and enables engine starting.
The pin must be entered within 120 sec, after which a key- off occurs automatically.
 Key-on/key-off using the key on the hands free lock with the passive key
Key-on can be performed by pressing the button (7) on the
hands free lock and with the presence of the passive key (4,
fig. 77).
Note
The passive key (4, fig. 77) Has a range of a few cm,
theref ...
 Entering pin code function for vehicle release
This function turns on the motorcycle "temporarily" in the
case of hf (hands free) system "malfunctions".
To activate the function, press the "emergency" hands free
...
Other materials:
Overhauling the rear swingarm
Inside the swingarm (8), in correspondence with the pivot point on the frame,
there is a pair of ball bearings (10) and a
spacer (11) on the rh side, and a pair of roller bearings (6), with sealing
rings (5), on the lh side.
To change the bearings, proceed as follows.
Remove the shims ( ...
Reassembly of the front half-fairings
Fit the clips (2) on the front rh half-fairing (1).
Join the rh support (4) and the front rh half-fairing (1) and keep them in
position by starting the screws (5).
Note
To mount the rh support (4) in a proper way, it is necessary to insert the
tab (g) of the front rh half-fairing (1) in t ...
Testing the battery charging system
Note
The on-screen icons used during this procedure are explained in a table at
the end of this section.
You can determine the engine rpm required for generator to produce just
enough current to charge battery, feed the
injection ignition system and all electric items fitted to motorcycle. Wh ...