
Ducati Diavel Service Manual: Oil cooler
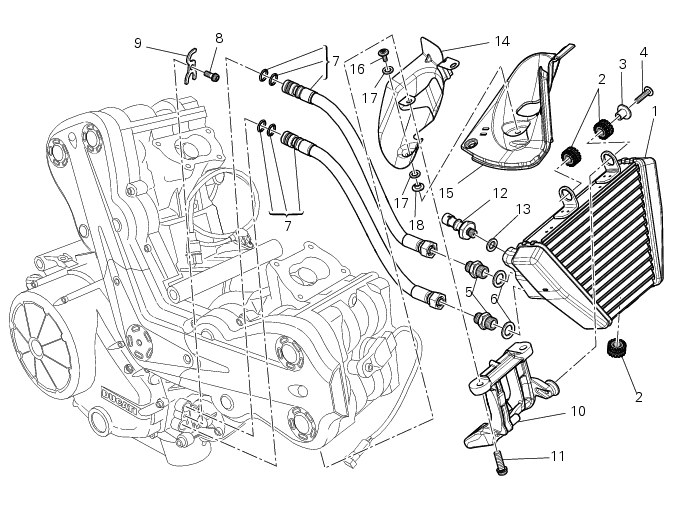
- Oil cooler
- Vibration damper mount
- Spacer
- Screw
- Nipple
- Aluminium gasket
- Oil delivery hose
- Screw
- Plate
- Bracket
- Screw
- Engine oil pressure sensor
- Sealing washer
- Heat guard
- Exhaust protection
- Screw
- Washer
- Spacer
Spare parts catalogue
Diavel abs oil cooler
Diavel carbon abs oil cooler
Important
Bold reference numbers in this section identify parts not shown in the figures alongside the text, but which can be found in the exploded view diagram.
 Refitting the oil pump
If removed, apply specific threadlocker on the bushing (7) outer thread, and
screw it in the crankcase half, observing the
height.
Position the reference bushings (15) and the oil sealing o-ri ...
 Removal of the lubrication system
Disconnect the sensor (12) of the main wiring.
Open the pipe grommet (11).
Undo the screw (8) and slide out the plate (9).
Slide the tubes (7) out of the half-casing having care not to ...
Other materials:
First warning - oil service 1000 km
The first warning is activated at 1000 km (600 miles) of odometer reading.
The (red) warning is activated as a large icon for 10 seconds upon every key-on
(1) then as a small warning that
remains displayed (2) until it is reset.
...
Removal of the rear wheel eccentric hub and rear wheel shaft
Before removing the eccentric hub, you must first remove the parts listed
below.
Slacken off the screws (34).
Remove the spacer (20) and the inner ring (21) on the chain side and remove the
wheel shaft (31) with the brake disc
(30) from the opposite side.
Remove the circlip (19 ...
Removal of the rear shock absorber
Loosen the screws (22) and remove the assembly (34) from the frame.
Loosen the screws (27) and remove the tank unit (s) of the shock absorber
from the support (19).
Hold the lh bush (6) and loosen the rh bush (5) to release the front side of
the shock absorber assembly.
Un ...