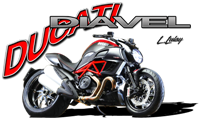
Ducati Diavel Owners Manual: Protective apparel
Always wear a helmet. Most motorcycle accident fatalities are due to head injuries.
For safety eye protection, gloves, and high top, sturdy boots should also be worn.
The exhaust system becomes very hot during operation, never touch the exhaust system. Wear clothing that fully covers your legs. Do not wear loose clothing which could catch on the control levers, footrests, wheels, or chain.
Any amount of alcohol will significantly interfere with your ability to safely operate your motorcycle. Don’t drink and ride.
Vehicle identification number (vin);
Every ducati motorcycle is identified by two identification numbers (see page 189). Fig. A specifically shows the frame identification numbers.

Label location (fig. B)


 Riding safety
The points given below are applicable for every day
motorcycle use and shoud be carefully observed for safe and
effective vehicle operation.
A motorcycle does not provide the impact protection of ...
 California emission control warranty statement
Your warranty rights and obligations
The california air resources board is pleased to explain the
emission control system warranty on your my 2011
motorcycle. In california, new motor vehicles must ...
Other materials:
Coolant temperature
This function indicates coolant indication state.
The temperature unit of measure can be selected (C or f).
The reading is indicated as follows:
If the reading is between - 39C and +39C "lo" is
shown flashing on the instrument panel (steady);
If the reading is between +40C an ...
Removal of the rear brake disc
Remove the rear eccentric hub (sec. 7 - 13, Removal of the rear wheel
eccentric hub and rear wheel shaft).
Undo and remove the four fixing screws (13) of the brake disk to the wheel axle
and remove the rear brake disk (14).
Loosen the four screws (24) and remove the rear phonic wheel (25). ...
Reassembly of the control unit
Insert the control unit (4) into the protecting sheath (5) and position it on
the airbox.
Position the relay supporting bracket (2) by starting and tightening the
screws (1) to a torque of 6 nm +/- 10% (sect. 3 -
3, Frame torque settings), and connect the control unit connectors (3).
...