
Ducati Diavel Service Manual: Reassembly of the control unit
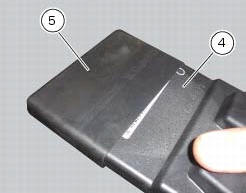
Insert the control unit (4) into the protecting sheath (5) and position it on the airbox.
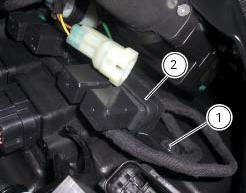
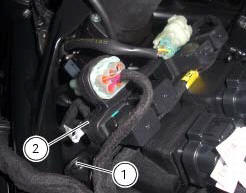
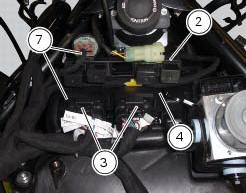
Position the relay supporting bracket (2) by starting and tightening the screws (1) to a torque of 6 nm +/- 10% (sect. 3 - 3, Frame torque settings), and connect the control unit connectors (3).

 Removal of the control unit
Loosen the screws (1) and remove the relay supporting bracket (2), disconnect
the connectors (3) and remove the control
unit (4) from the vehicle.
...
 Fuel system circuit
The fuel system circuit consists of:
An electric pump, driven by the injection relay, which is in turn
controlled by the ecu (engine control unit)
A fuel filter
A pressure regulator
Two i ...
Other materials:
Checking the coolant level
To the specified intervals in the "scheduled maintenance chart" (sect. 4 - 2)
Check the coolant level contained in
the expansion reservoir, on the right side of the vehicle.
The coolant level must be between the max. And min marks on the tank.
If the level is low, top up with the recommende ...
Removal of the tail light
Disconnect the connectors (a) and (b) of the tail lights (1) and (13).
Loosen the screws (4) and slide the tail lights (1) and (13) to the rear side;
recover the four spacers (3) and the washers
(14).
...
Removal of the timing gears
Slide out driving gear (a) of timing gear pair (13) and remove the woodruff
key (14).
Relieve the staking on the lock washer (12) of the nut (11).
Restrain the driven timing gear by inserting a pin in one of the holes, and
unscrew the nut (11).
Remove the nut (11), washer (12) ...