
Ducati Diavel Service Manual: Reassembly of the front half-fairings
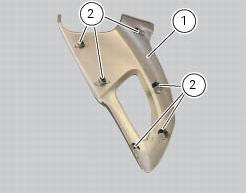
Fit the clips (2) on the front rh half-fairing (1).
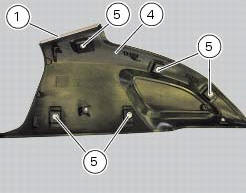
Join the rh support (4) and the front rh half-fairing (1) and keep them in position by starting the screws (5).
Note
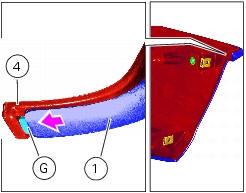
To mount the rh support (4) in a proper way, it is necessary to insert the tab (g) of the front rh half-fairing (1) in the slot available in the support.
Tighten the screws (5) to a torque of 5 nm +/- 10% (sect. 3 - 3, Frame torque settings).
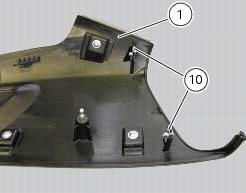
Fit the clips (10) on the front rh half-fairing (1).
Follow the same procedure to reassemble the lh half-fairing (12).
 Disassembly of the front half-fairings
Undo the screws (5) and separate the rh support (4) from the front right
half-fairing (1).
Follow the same procedure to disassemble the lh half-fairing (12). ...
 Refitting the fuel tank fairings
Make sure that the following components are fitted on the tank fairing (22):
Spacers (18);
Seals (20).
Fit the clips (19) to the central cover (22) at the positions shown,
inserting the tab ...
Other materials:
Default function (resetting ducati default parameters)
This function resets the parameters set by ducati for each
riding style.
To access the function it is necessary to view the "setting" menu page 48, using
button (1, fig. 14) ?"
" or (2, fig. 14) ?" " select the "riding mode"
function and press the
r ...
Checking the battery charging system
To check the current flow of the recharging circuit, use the "dds" diagnosis
instrument, which is equipped with an
inductive clamp-type amperemeter: refer to chapter "testing the battery charging
system", sect. 6 - 11
With the dds diagnosis instrument you can determine the engine rpm required ...
Tips for use on the track
We recommend level 8 be used for a couple of full laps (to
allow the tyres to warm up) in order to get used to the
system. Then try levels 7, 6, etc., In succession until you
identify the dtc intervention level that suits you best (always
try each level for at least two laps to allow the tyres t ...