
Ducati Diavel Service Manual: Recovery in the event of flat active key battery
If the active key battery is running low or is flat, the hands free system shows the relative icon on the dashboard.
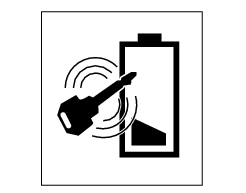
The following image shows the icon appearing on the circular area of the dashboard: this indicates that the active key battery is flat.
For the replacement procedure of the active key battery refer to paragraph "active key" - "replacing the battery in the active key" of this chapter.
The active key still works even if its battery is flat. In this case, however, it functions in exactly the same way as the passive key. During the dashboard switch on procedure, the key must be physically placed on the antenna. To reach the antenna remove the seat (sect. 5 - 3, "Removal of the seat").
Note
After the active battery key is replaced, the low battery icon may still be displayed the next time the dashboard is switched on. This icon will disappear after a few seconds.
 Recovery procedure with no key
When the dashboard is on and the key has been recognised, the hands free
attempts to detect the key every 60 seconds.
If the engine is off and the on/off switch on the handlebar is turned to "run ...
 Recovery procedure in the event of electric steering lock fault
If any fault occurs during activation of the electric steering lock: for
example, if the pin jams, if the handlebar is moved
while the pin is deployed or if there is excessive strain on the electri ...
Other materials:
Specific tools for the frame
88713.1072 Drift to install half bearing in bottom yoke
88713.2562 Chain assembly tool
88713.1058 Wrench for steering shaft nut
88713.1062 Tool for installing steering head bearings
88713.2951 Rear wheel balancing tool
88713.3211 Wrench for adjustment of the eccentric hu ...
Hands free key (hf) not recognised
The activation of this (amber yellow) "warning" indicates that the hands free
system does not detect the active key (1,
fig.62) Near the vehicle.
Note
Check that the active key (a) is near the vehicle (and has not been lost)
or that it works properly.
...
Removal-refitting of the engine assembly
Screw
Special screw
Nut
Screw
Swingarm pivot
Special screw
Washer
Spare parts catalogue
Diavel abs frame
Diavel abs swingarm
Diavel carbon
abs
frame
Diavel carbon
abs
swingarm
Important
Bold reference numbers in this section identify parts not shown in the
figures a ...