
Ducati Diavel Service Manual: Recovery procedure with no key
When the dashboard is on and the key has been recognised, the hands free attempts to detect the key every 60 seconds.
If the engine is off and the on/off switch on the handlebar is turned to "run off", if no key is detected within 10 seconds, the dashboard switches off automatically.
If the engine is running and no key is detected upon exceeding a speed of 5 km/h after setting off from an initial standstill (speed = 0 km/h), the hands free system displays the no key symbol on the dashboard (if the key has been accidentally left in the garage, for example).
In the former case, the vehicle continues to function normally until it is
switched off again. Once switched off, the vehicle
cannot be started again without the key (key left behind, lost or no longer
functioning correctly). In this case it is possible
to start the bike only with the pin code (see the procedure described in chapter
"start procedure with pin code (no
keys)" of this section). 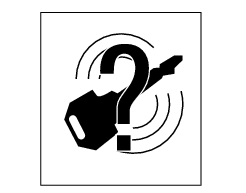
The following image shows the icon appearing on the tank dashboard: this icon indicates that no key is detected.
If the motorcycle has been started using the passive key or using the active key in transponder mode (no battery or flat battery), it is normal for the 'no key' icon to be displayed. In fact, once the vehicle has been started and the key detached from the antenna placed in the document compartment under the seat the bike will remain on until the following switch off with the dashboard displaying that the key is not available. Once both engine and dashboard have been switched off, the key must be placed over the antenna again to restart the vehicle.
 How to turn the motorcycle off
To turn the motorcycle off, turn the switch from "run on" to "run off". The
engine stops. To switch the dashboard off,
push the on/off switch downwards. When released, the switch automatically
re ...
 Recovery in the event of flat active key battery
If the active key battery is running low or is flat, the hands free system
shows the relative icon on the dashboard.
The following image shows the icon appearing on the circular area of the
d ...
Other materials:
Tft - parameter setting/display
Warning
Any adjustments to the dashboard must only be carried out when the
motorcycle is stationary. Never operate the
dashboard controls while riding the motorcycle.
At the end of the check, the dashboard always displays as the "main"
indication the odometer (tot) on the left and the
averag ...
Refitting the seat
Note
Apply recommended grease to the hole (a) of latch (6).
Fit the seat (1) as follows: insert the tabs (b) (on the front side) under
the rubber pads (c) of the gloves compartment;
then push the seat rear side until hearing the lock latch click.
...
Overhauling the front wheel
Wheel bearings
Before checking the dimensions, check the wear on wheel bearings. Check for
wear by hand after cleaning and degreasing
the bearings in their seats.
Turn the inner race.
Check the amount of radial and axial play. Excessive play will cause vibration
and make the bike unstabl ...