
Ducati Diavel Service Manual: Refitting the filler cap
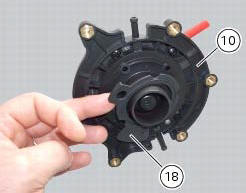
Position seal (18) in tank cap (10) as shown and reassemble following the removal procedure in the reverse sequence.
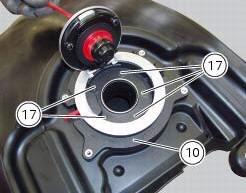
In particular tighten the screws (17) to a torque of 3 nm +/- 10% (sect. 3 - 3, Frame torque settings).
 Removal of the fuel tank filler cap
Remove tank covers (sect. 5 - 2, Removal of the fuel tank fairings).
Remove hoses (8) and (15) from the filler cap assembly (10).
Open the filler cap.
Unscrew the outer screws (17) securing ...
 Replacing the tank flange and fuel sensor
Loosen the screws (19) securing the fuel tank flange (20).
Remove the flange (20) from the tank (20).
Recover the seal (21).
Undo and remove the two fixing screws (g) and move the protectio ...
Other materials:
Reassembly of structural components and the frame
Check for the nuts with clips (8).
Apply recommended grease on the threads of the adjusters (4) and the ring
nuts (5) having care not to have grease on
the surface (c) of the adjusters.
Tighten the adjusters on the ring nut side opposite to that featuring flats
until bringing the surfac ...
Rear brake
Rear speed sensor (abs)
Screw
Washer
Spring
Brake switch (rear)
Brake lever (rear)
Rear pump - control unit pipe
Sealing washer
Pin
Bush
O-ring
Screw
screw
Rear brake disc
Rear brake calliper
Rear brake master cylinder
Hose clip
Pushrod
Screw
Rubber pad
...
Refitting the radiator
The reassembly procedure is the same for both radiators.
Check for the nuts with clips (8).
Refit the rh radiator (13) on the frame and tighten the screws (4) and (5)
with the spacers (6) to a torque of 10 nm
+/-10% (sect. 3 - 3, Frame torque settings).
Connect the connections of ...