
Ducati Diavel Service Manual: Refitting the front wheel
When all the necessary inspections have been completed, refit the wheel as follows.
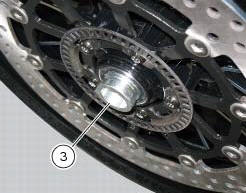
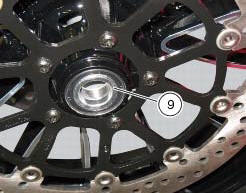
Fit the spacers (3) and (9) to the seal rings on the sides of the wheel hub.
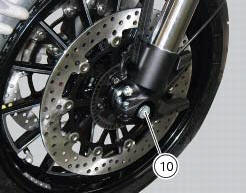
Install the complete wheel between the fork legs.
Lubricate the shank and thread of the wheel axle (10).
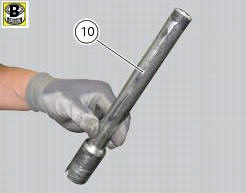
Take the pin (10) fully into the wheel hub.
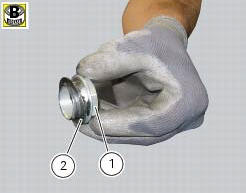
Fit the washer (2) on the end of the axle.
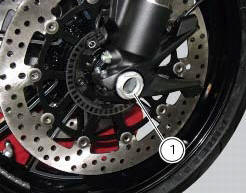
Grease the thread and the underside of the head of the axle lock nut (1), then screw it on.
Tighten the nut (1) to the torque of 63 nm +/- 5% (sect. 3 - 3, Frame torque settings).
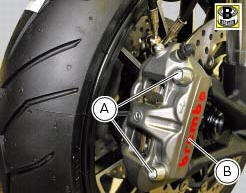
Grease the threads and undersides of the heads of screws (a).
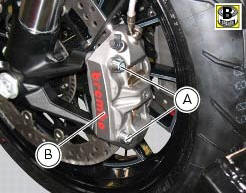
Tighten the two retaining screws (a) of the brake callipers (b) to a torque of 2 nm +/- 10%. (Sect. 3 - 3, Frame torque settings) operate the front brake lever two or three times.
Hold the lever pulled towards the handgrip and simultaneously tighten the screws (a) to a torque of 44 nm +/- 5%(sect. 3 - 3, Frame torque settings).
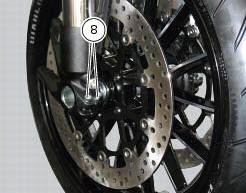
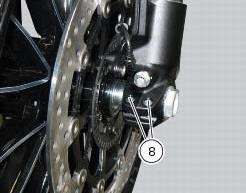
Before tightening the screws (8), lower the bike to the ground and push up and down on the handlebar to load the suspension; so the fork legs will become properly seated onto the wheel shaft.
Tighten the screws (8) to a torque of 10 nm +/- 5% (sect. 3 - 3, Frame torque settings), proceeding in a 1-2-1 sequence.
 Overhauling the front wheel
Wheel bearings
Before checking the dimensions, check the wear on wheel bearings. Check for
wear by hand after cleaning and degreasing
the bearings in their seats.
Turn the inner race.
Check ...
 Rear wheel
Right-hand wheel nut
Washer
Spacer
Valve
Wheel
Circlip
Spare parts catalogue
Diavel abs front and rear wheels
Diavel carbon
abs
front and rear wheels
Important
Bold reference ...
Other materials:
Vehicle speed indicator
This function displays vehicle speed (km/h or mph depending on the set
measurement system).
The dashboard receives information about the actual speed and displays the
number increased by 5%.
Maximum speed displayed is 299 km/h (186 mph).
Over 299 km/h (186 mph) the display will show a s ...
Starter motor
Power:
0.7 Kw/12 v
Direction of rotation:
counter clockwise viewed from power take-off side.
The starter motor is highly compact and reliable and therefore rarely gives
any type of problem. In case of troubles,
ensure that the starter motor cable terminal is properly tightened under the n ...
Electrical components support
Clip
Screw
Voltage regulator
Battery fixing bracket
Battery support
Vibration damper mount
Hose clip
Vibration damper mount
Clip
Washer
Screw
Cover
Cable grommet
Battery
Battery mat
Screw
Bracket
Solenoid starter
Spring washer
Spacer
Screw
Horn
Scre ...