
Ducati Diavel Service Manual: Refitting the radiator
The reassembly procedure is the same for both radiators.
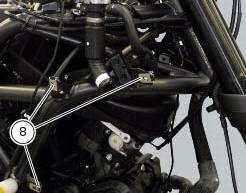
Check for the nuts with clips (8).
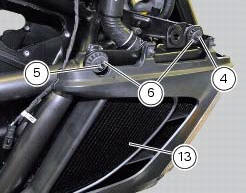
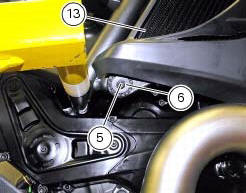
Refit the rh radiator (13) on the frame and tighten the screws (4) and (5) with the spacers (6) to a torque of 10 nm +/-10% (sect. 3 - 3, Frame torque settings).
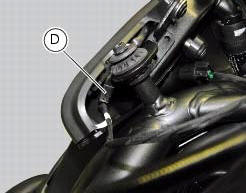
Connect the connections of wiring (d) to the front turn indicators.

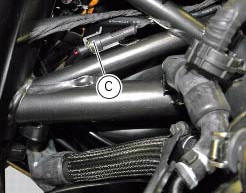
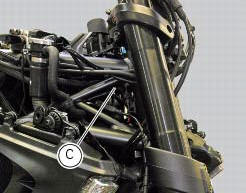
Reconnect the electro-fan wiring of the radiators to the main wiring (c).
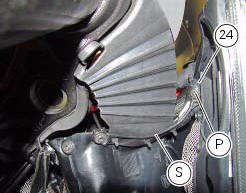
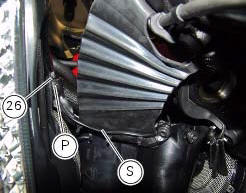
Once both radiators have been mounted, join the two internal air ducts (24) and (26) by tightening the screws (30) to a torque of 4 nm +/- 10% (sect. 3 - 3, Frame torque settings).

Fix supports (s) of the front splashguard to the air ducts (24) and (26) by tightening the screws (p) to a torque of 4 nm +/- 10% (sect. 3 - 3, Frame torque settings).

 Reassembling the water radiator unit
The procedure is the same for both radiators.
Check the presence of clips (1) at the positions of the external coolant
radiator cover (23).
If removed, fit the front turn indicator (32) on the ...
 Water pump
Screw
Washer
Circlip
Water pump outlet union
Bearing
bearing
Spacer
Aluminium gasket
Mechanical seal
Water pump impeller
Bush
Water pump cover assembly
Screw
Plug
Se ...
Other materials:
Refitting the front forks
Refit the fork legs, positioning them at the height shown in the figure
relative to the upper surface of the bottom yoke.
Warning
The difference in height between the two fork legs must be no
greater than 0.1 Mm.
Position the fork legs (5) and (6) on the yoke base (4) and on the steering ...
Refitting the front mudguard
Warning
Do not use the motorcycle without the front mudguard fitted to avoid
the risk of the brake pipes fouling the wheel on
braking.
Insert the screws (5) in spacers (6) with recommended threadlocker, as shown
in the figure.
Position the front mudguard (1) and start the special screws (5 ...
Key-on/key-off using the pin code (immobilizer release)
Key-on can be performed by pressing the button (7) on the
hands free lock (1, fig. 77) Without the presence of the keys
(3, fig. 77) And (4, fig. 77) And entering the pin code on the
dashboard.
Key-off can be performed by pressing the button (6) on the
handlebar / hands free key (7) / engine ...