
Ducati Diavel Service Manual: Refitting the swingarm
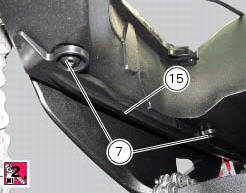
Apply the recommended threadlocker to the screws (7).
Install the lower chain guard (15) on the swingarm (8), fastening it with the screws (7): tighten the screws (7) to a torque of 4 nm +/- 10% (sect. 3 - 3, Frame torque settings).
Locate the swingarm (8) on the frame.
Lubricate with recommended grease the swingarm shaft (1) with the screw (3) and insert it fully home on the frame and through the brackets (36).
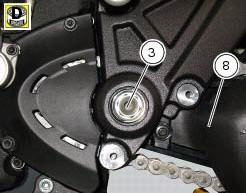
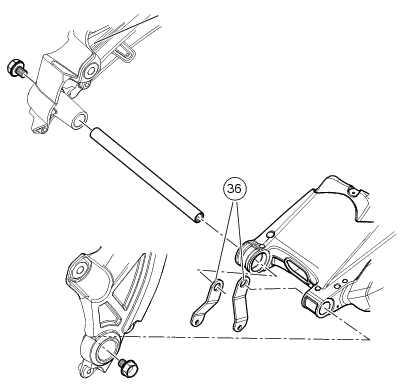
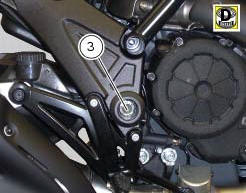
On the bike opposite side fix the swingarm shaft (1) with the screw (3) after having lubricated it with recommended grease, and fit the washer (2) between frame and swingarm.
Tighten the screw (3) to the torque of 72 nm +/- 5% (sect. 3 - 3, Frame torque settings).
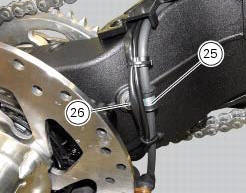
Position the rear brake hose, the rear speed sensor cable, and the rear wiring on the swingarm, by starting the screws (26) of the cable grommet (25).
Tighten the screw (26) to a torque of 8 nm +/- 10% (sect. 3 - 3, Frame torque settings).
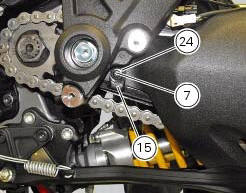
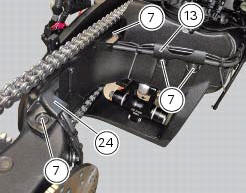
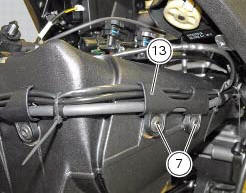
Refit the upper chain slider (24) and the hose guide (13) and tighten the screws (7) to a torque of 4 nm +/- 10% (sect. 3 - 3, Frame torque settings).
Refit the rear wheel eccentric hub as described in chapter "refitting the rear wheel eccentric hub and rear wheel shaft" of this section.
 Overhauling the rear swingarm
Inside the swingarm (8), in correspondence with the pivot point on the frame,
there is a pair of ball bearings (10) and a
spacer (11) on the rh side, and a pair of roller bearings (6), with sealing ...
 Final drive
Circlip
Nut
Washer
Nut
Rear sprocket flange
Cush drive bush
Inner ring
Chain
Spacer
Chain cover
Screw
Nut
Lock washer
Front sprocket
Spacer
O-ring
Rear sprocket
...
Other materials:
Removal of the gear selector lever
Unscrew and remove the fixing screws (18) and (20) of the complete gear
selector lever (21) and collect the spacer (19).
Remove the gearchange mechanism complete with the shaft, spring, and stop plate.
Important
Visually inspect the gear selector claw (14) for wear, particularly aroun ...
Throttle valve position sensor
Introduction
The throttle valve position sensor (tps) of the diavel is mounted on the
throttle body.
The sensor is integrated into the throttle valve actuator motor, which
turns the spindle of the vertical cylinder throttle
valve directly.
The sensor sends information to the engine con ...
Removal of the cylinder heads
Using the tool code 88713.2676, Undo the nuts (21) on the cylinder head stud
bolts.
Remove the cylinder head nuts (21) and special washers (22).
Remove the cylinder head assembly by lifting it off the engine studs.
Repeat the same procedure for the other cylinder head. ...