
Ducati Diavel Service Manual: Removal of belly fairing
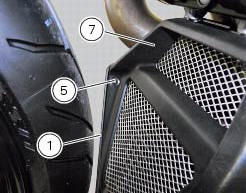
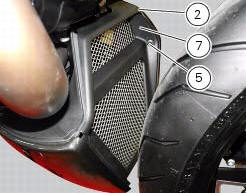
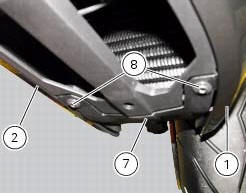
Loosen and remove the screws (5) and (8) that secure the oil cooler (7) to the rh (1) and lh (2) belly fairings.
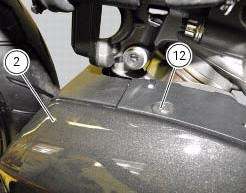
Remove the lh belly fairing (2) by loosening the screws (3) with relevant washers (4) and the screws (12).
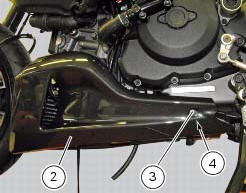
Follow the same procedure to remove the rh belly fairing (1).
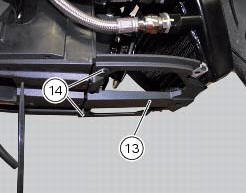
Loosen the screws (14) and remove the bracket (13 from the electrical components support.
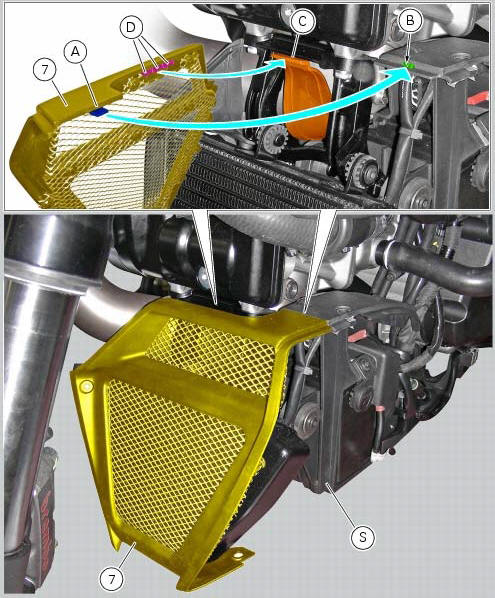
Remove the oil cooler shield (7) from the electrical components support (s) by releasing the tab (a) from the slit (b) and tab (c) from retainers (d).
 Belly fairing
Rh belly fairing
Lh belly fairing
Special screw
Nylon washer
Screw
Central belly fairing
Oil cooler shield
Special screw
Clip
Washer
Clip
Screw
Bracket
Screw
Spare ...
 Reassembly of belly fairing
Position the oil cooler shield (7) inserting the tab (a) into the slit (b) in
the electrical components support (s).
Note
On refitting, make sure that the tab (c) remains positioned under the
re ...
Other materials:
Reassembling the water radiator unit
The procedure is the same for both radiators.
Check the presence of clips (1) at the positions of the external coolant
radiator cover (23).
If removed, fit the front turn indicator (32) on the cover (23) and tighten the
screws (27) to 2 nm +/- 10% (sect. 3 - 3,
Frame torque settings).
No ...
Coverage
Warranty defects shall be remedied during customary
business hours at any authorized ducati motorcycle dealer
located within the united states of america in compliance
with the clean air act and applicable regulations of the
united states environmental protection agency and the
california air r ...
Adjusting the steering head bearings
Note
To adjust the steering bearing clearance, follow what is described in
sect. 4 - 3, Adjusting the steering head bearings.
If the problems found are not solved, check the wear of steering bearings (6)
and replace them, if necessary, as described
in paragraph "removal of the steering head c ...