
Ducati Diavel Service Manual: Removal of the fuel tank fairings

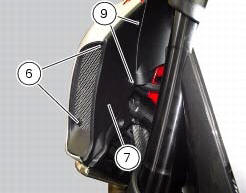
Remove the rh air inlet (7) by loosening screws (6) and (9).
Undo the retaining screw (3) of the rh front half-fairing (1).
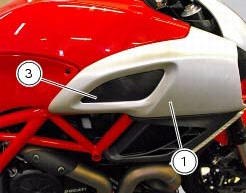
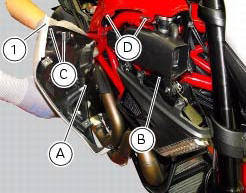
Slightly pull the pin (a) to disengage it from the seal (b), and remove the rh front half-fairing (1) by sliding it onwards and releasing the tabs (c) from the seals (d).
Follow the same procedure to remove the lh half-fairing (12).

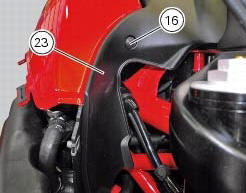
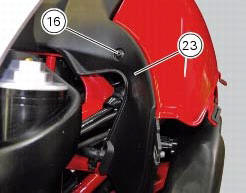
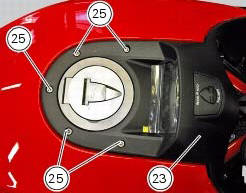
Loosen the screws (16) and (25) securing the tank plug cover (23) but do not remove it.
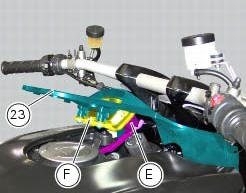
Lift the tank plug cover (23) up in order to reach the wiring (e) of the dashboard (f).
Disconnect the wiring (e) from the dashboard (f).
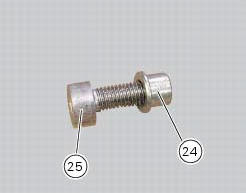
Remove the tank plug cover (23) from the vehicle recovering the screws (25) and spacers (24).
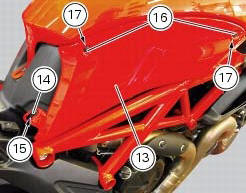
Remove the lh tank fairing (21) by loosening screws (16) and (14); recover the washers (17) and (15).
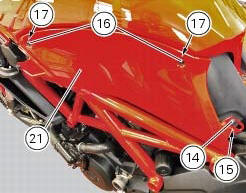
Remove the rh tank fairing (13) by loosening screws (16) and (14); recover the washers (17) and (15).
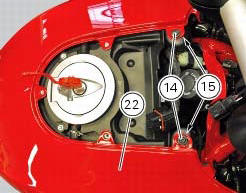
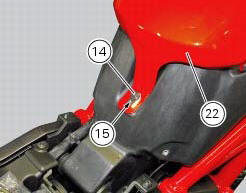
Remove the tank fairing (22) by loosening the screws (14); recover the nylon washers (15).
 Fairings
Rh front half-fairing
Clip
Screw
Right-hand support
Screw
Screw
Rh air inlet
Lh air inlet
Screw
Clip
Left-hand support
Lh front half-fairing
Lh tank fairing
Screw
Ny ...
 Disassembly of the front half-fairings
Undo the screws (5) and separate the rh support (4) from the front right
half-fairing (1).
Follow the same procedure to disassemble the lh half-fairing (12). ...
Other materials:
Distance travelled on fuel reserve: trip fuel
This function shows the distance travelled on fuel reserve (in
km or miles depending on the specific application).
When the fuel light comes on, the display automatically
switches to the "trip fuel" indicator.
Trip fuel reading remains stored even after key-off until the
vehicle i ...
Reassembly of the tool tray
Place the tool tray unit (23) on the lateral brackets (2) and (3) by
tightening the screws (24) to 14 nm +/- 5% (sect. 3-3,
Frame torque settings).
If the handle guide (32) has been previously removed, position it on the tray
(23) and tighten the screws (34) to 20 nm
+/- 5% (sect. 3-3, Fram ...
Removal of the rear wheel eccentric hub and rear wheel shaft
Before removing the eccentric hub, you must first remove the parts listed
below.
Slacken off the screws (34).
Remove the spacer (20) and the inner ring (21) on the chain side and remove the
wheel shaft (31) with the brake disc
(30) from the opposite side.
Remove the circlip (19 ...