
Ducati Diavel Service Manual: Removal of the primary drive gear
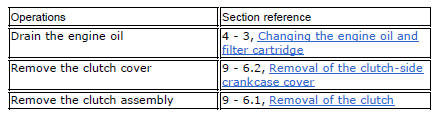
Withdraw the clutch housing (1) complete with driven gear of the primary pair (a).
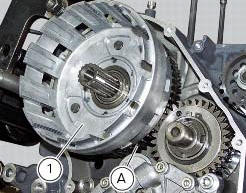
Remove the inner spacer (2).
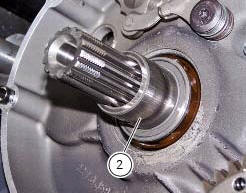
Remove the oil pump (d) (sect. 9 - 2.1, Removal of the oil pump).
Lock the primary pinion (b) with the holding tool 88713.3417 And loosen the threaded ring nut (3) using the bush part no. 88713.3406.
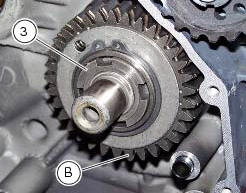
Remove the nut (3) and safety washer (4).

Remove the complete primary drive gear (b) using a commercial puller and placing a brass or aluminium pad between the end of the crankshaft and the puller screw.
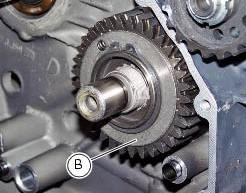
Remove the spacer (c).
 Primary drive gears
Clutch drum/primary drive gears
Spacer
Threaded ring nut
Lock washer
Spare parts catalogue
Diavel abs clutch
Diavel abs connecting rods
Diavel carbon
abs
clutch
Diavel carbon
ab ...
 Refitting the primary drive gears and checking backlash
Fully degrease the crankshaft splined end and the corresponding spline on the
primary drive gear.
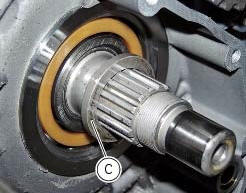
Position the spacer (c) onto the crankshaft.
Fit the driving gear (b) onto the crankshaft wi ...
Other materials:
Removal of the tail light
Disconnect the connectors (a) and (b) of the tail lights (1) and (13).
Loosen the screws (4) and slide the tail lights (1) and (13) to the rear side;
recover the four spacers (3) and the washers
(14).
...
Routing of wiring on frame
The routing of the wiring has been optimised to ensure the minimum
obstruction.
Each section is designed to prevent interference with parts that might damage
wires or cause operating failures when
riding. The plates on the following pages show the origins ("0" points) for
correct re-routin ...
Refitting the clutch-side crankcase cover
Clean and degrease mating surfaces on the clutch-side crankcase half cover
and crankcase and ensure that locating bush
(12) and the o-ring (11), located in correspondence with the oil way, are
installed in the crankcase.
Apply an even, regular bead of ducati liquid gasket (a) on the mating ...