
Ducati Diavel Service Manual: Removing the frame and the lateral footrests
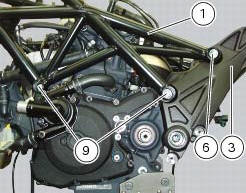
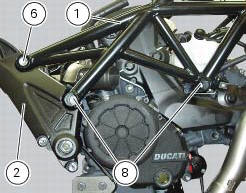
Loosen the two special screws (6) to separate the frame (1) from the lateral brackets (2) and (3).
On the left side of the vehicle block retaining pins (9) and loosen the nuts (8) on the right side at the same time.
Slide out the retaining pins (9) and remove the frame (1) from the lateral brackets and the engine block.
 Removal of the tool tray
To remove the tool tray unit from the lateral footrests, loosen the screws
(40) and remove the splashguard (20).
Undo the screws (15) and remove the cover (16).
Move the wiring branch ...
 Checking the frame
Check the dimensions of the frame against the dimensions shown here to
determine whether it needs to be realigned or
renewed.
Important
Damaged frames must be changed, not repaired. Any work carr ...
Other materials:
Checking valve clearances
To check the valves clearance, it is necessary to have access to the cylinder
head covers and then remove the
components listed below.
Unscrew the two fixing screws (1) of the cover (2) according to the
crankshaft.
Fit the tool handgrip 88713.0123 In the holes of the generator cover t ...
Reassembling the electrical components support
Check the presence of clips (1), (9) and (24) on the support (5).
Check the presence of rubber pads (6) and (8) and of cable grommet (7).
Check that the voltage regulator (3) and the solenoid starter (18) are in
place on the support (5) with their wiring as
shown.
The horn (22) mus ...
Flywheel - alternator
Screw
Alternator stator
Plug
Sealing ring
O-ring
Cover
Screw
Aluminium gasket
Screw
Bracket
Locating bush
Screw
generator cover
Flange
Flanged nut
Plane washer
Flywheel
Washer
Inner ring
Needle roller bearing
Electric starter driven gear
Starter clutc ...