
Ducati Diavel Owners Manual: Trip 1 meter
This function shows the distance travelled since the trip meter was last reset (in km or miles depending on the specific application).
Holding the button (1, fig. 14) 
pressed for 3 seconds
when this function is displayed resets the trip meter.
When the reading exceeds 9999.9, Distance travelled is reset and the meter automatically starts counting from 0 again.
If the system measurement units are changed at any moment through the "set units" function of the setting menu, or if there is an interruption in the power supply (battery off), the distance travelled is reset and the count starts from zero (considering the newly set unit of measurement).
 Note
Note
When this value is reset, also the "average fuel consumption", "average speed" and "trip time" functions are reset.
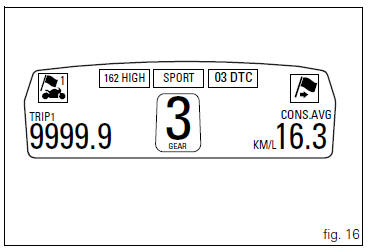
 Total distance covered indicator: "odometer"
This function shows the total distance covered by the vehicle
(in km or miles depending on the specific application).
At key-on the system automatically enters this function.
The odometer readi ...
 Trip 2 meter
This function shows the distance travelled since the trip
meter was last reset (in km or miles depending on the
specific application).
Holding the button (1, fig. 14) ?
pressed for 3 seconds
w ...
Other materials:
Reporting of safety defects
If you believe that your vehicle has a defect which could
cause a crash or could cause injury or death, you should
immediately inform the national highway traffic safety
administration (nhtsa) in addition to notifying ducati north
america. If nhtsa receives similar complaints, it may open
an in ...
How to switch the dashboard on
The dashboard may switched on either from the on/off switch on the handlebar
or from the button on the hands free
system.
With the engine off, the on/off switch is turned to "run off".
With the motorcycle and dashboard off, the on/off switch is turned to "run
off".
To switch the dash ...
Removal of the cylinder/piston assembly
Loosen the clamps (7) and remove the hoses (8) and (9) from the cylinder
barrels (10) and from the alternator-side
crankcase cover.
If damaged, unscrew the unions (6).
Note
The following procedure is described with the engine removed from the
frame and the cylinder head r ...