
Ducati Diavel Service Manual: Tester power supply
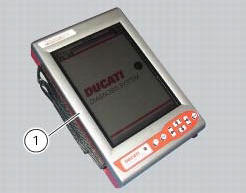
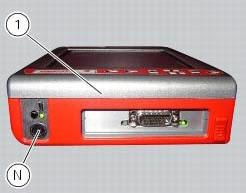
The dds (1) part number 97900.0215 Can be powered from the vehicle as follows:
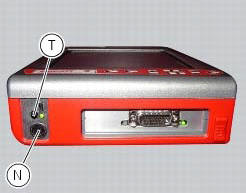
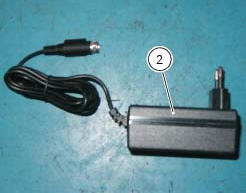
- From the mains power supply: by connecting the power supply connector
(n) to the network power supply (2) part no.
97900.0224;
- From the motorcycle: connecting the corresponding cables (see paragraph "connection to the motorcycle");
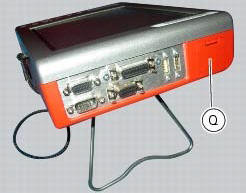
- From the tester's internal battery: the battery (q) is housed in the top part of the tester. To operate the tester (1) using the internal battery and to recharge the battery, refer to the "user manual" supplied with the dds diagnosis instrument.
To switch on the display, press the button (t).
Connection to the motorcycle
The tester requires a power supply voltage within 9 and 16 volts d.C.
Make sure voltage never drops below this limit during operation: this situation could occur during engine starting and idling on motorcycles in which the battery is not in perfect working order. If the tester detects a power supply voltage lower than 9 volts, the current procedures will be reset; when the voltage returns to the acceptable tolerance limits the procedure must start again from the beginning.
The dds diagnosis instrument (1) may be powered from the motorcycle in any one of the following ways:
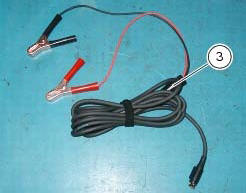
- By connecting the instrument power connector (n) to the battery connector (3) part no. 97900.0230 And the latter to the vehicle battery;
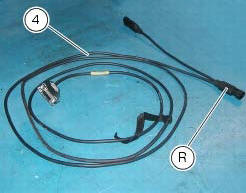
- By connecting the instrument diagnosis connector (p) with the power
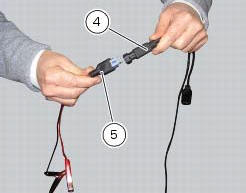
supply and diagnosis cable (4) part no.
97900.0227S; then connect the supply and diagnosis cable outlet (r) with the battery adaptor (5) part no.
97900.0228 And the adapter to the bike battery.

Note
For connection of the various devices required for self-diagnostic procedures, consult the instruction handbook supplied with the tester.
 Description of the diagnosis instrument (dds)
The "dds" diagnostic system lets you diagnose any faults in the
injection-ignition system via a serial port. The system is
also equipped with functions to test various devices on the motorcycle. Th ...
 Dds diagnosis instrument
The main functions of the dds diagnosis instrument can be summarised as
follows:
Retrieval of errors (faults) of the ignition-injection system stored in
the engine control unit memory and the ...
Other materials:
Checking protection and safety device components
Checking the side stand switch
Remove the switch (1) from the side stand undoing screw (2) and disconnect
the main wiring connector from the switch
(see paragraph "routing of wiring on frame", sect. 6 - 1).
Use an analogue or digital multimeter (sect. 6 - 11, Using a multimeter to check
the ...
Gearchange mechanism
Gearchange pedal
Bush
Rubber pad
Pin
O-ring
Gearchange lever tie-rod
Screw
Gearchange lever
Washer
Screw
Ball joint
Nut
Nut
Nut with left-hand thread
Lh ball joint
Spare parts catalogue
Diavel abs l.H. Footrests
Diavel carbon
abs
l.H. Footrests
Important
B ...
Air intake
Air filter
Right air duct
Screw
Air temperature sensor
Screw
Left air duct
Sealing washer
Threaded insert
Spacer
Clamp
Breather hose
Spare parts catalogue
Diavel abs air intake - oil breather
Diavel carbon
abs
air intake - oil breather
Important
Bold reference num ...