
Ducati Diavel Service Manual: Removal of the exhaust system
Remove the silencer, as described in the paragraph "removing the silencer" of this section.
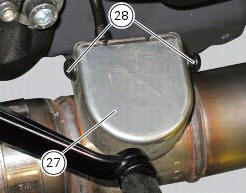
Loosen the screws (28) and remove the exhaust by-pass valve cover (27).
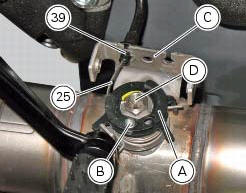
Turn the exhaust valve pulley (a) to facilitate the throttle cable (25) output.
Release the end fitting (b) of the cable (25) from the exhaust valve (d) and remove the circlip (39).
Release the control cable (25) from the plate (c).
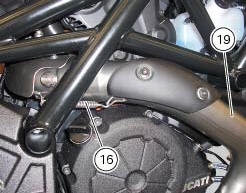
Remove the two retaining springs (16) and remove the central exhaust pipe (26).

Remove the retaining spring (16) and the upper exhaust pipe (19).
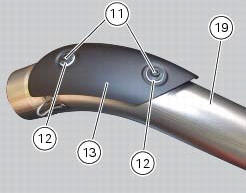
Loosen the screws (11) and remove the heat guard (13) from the upper exhaust pipe (19); keep the spacers (12).
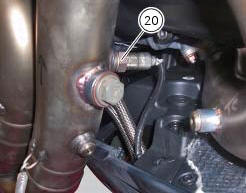
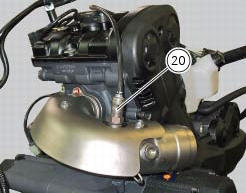
Undo and remove the horizontal cylinder lambda probe (20).
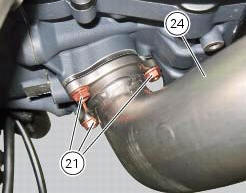
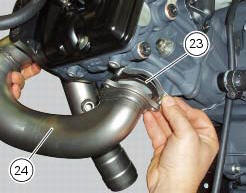
Undo and remove the three fixing nuts (21) and remove the horizontal manifold (24) with the gasket (23).
Undo and remove the vertical cylinder lambda probe (20).
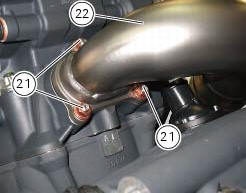
Undo and remove the three fixing nuts (21) and remove the manifold (22) with the gasket (23).
Unscrew the nuts (9) and remove the heat guard from the manifold (10).

 Removing the silencer
Loosen the clamp (38) that retains the silencer (4) to the complete exhaust
system.
While holding the nut (8), loosen the screw (1) and remove the silencer (4)
from the motorcycle.
Loose ...
 Refitting the exhaust system
Refit the heat guard on the manifold (10) by tightening the nuts (9) to a
torque of 10 nm +/- 10% (sect. 3 - 3, Frame
torque settings).
Position the vertical exhaust manifold (22) on the verti ...
Other materials:
Reassembly of the control unit
Insert the control unit (4) into the protecting sheath (5) and position it on
the airbox.
Position the relay supporting bracket (2) by starting and tightening the
screws (1) to a torque of 6 nm +/- 10% (sect. 3 -
3, Frame torque settings), and connect the control unit connectors (3).
...
Removal of the air filters
Work on the vehicle right side, loosen screws (3) that secure the intake duct
(2) to the airbox, and the radiator retaining
screw (a); recover the washer (b).
Remove the intake duct (2).
Proceed in the same way to remove the lh intake duct (6), and disconnect the
connector (c) ...
Identification data
All ducati motorcycles have two identification numbers, for
frame (fig. 1) And engine (fig. 2).
Note
These numbers indicate the motorcycle model and
should be quoted when ordering spare parts.
...