
Ducati Diavel Service Manual: Technical specifications
General
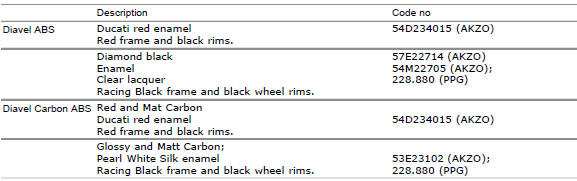
Colours
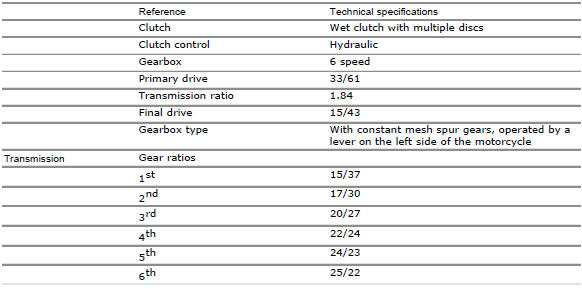
Transmission
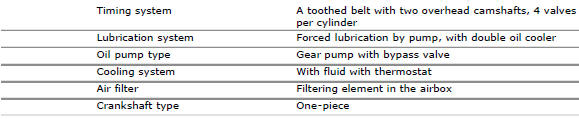
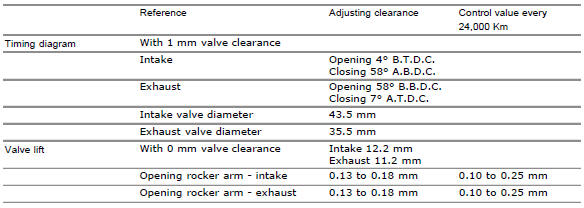
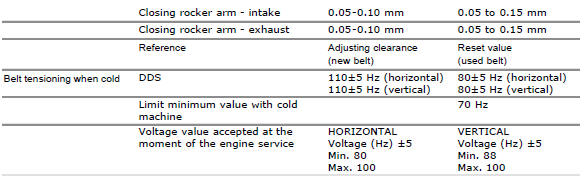
Timing system/valves
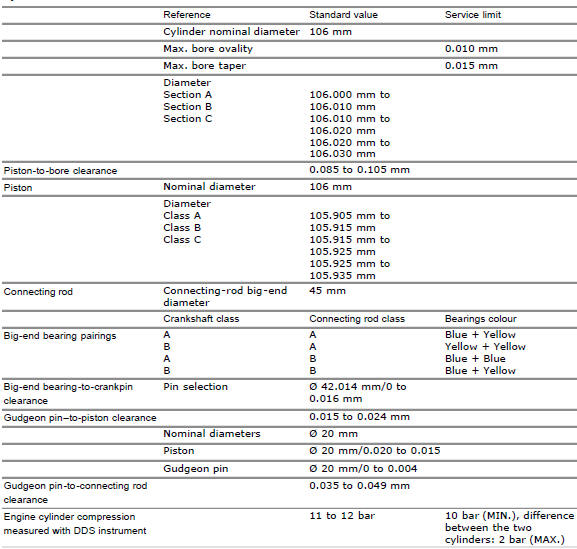
Crankshaft

Cylinder/piston
Gearbox

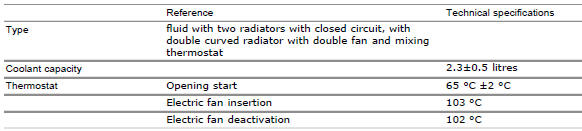
Cooling system
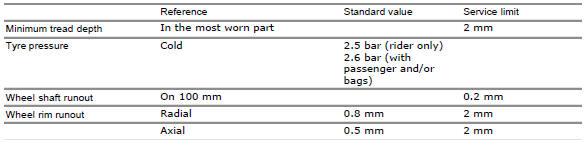
Front wheel
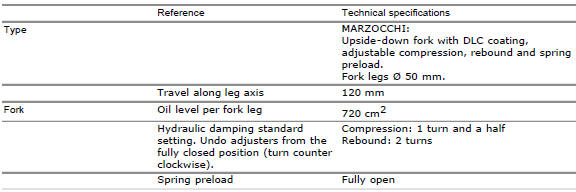
Front suspension (diavel abs)

Front suspension (diavel carbon abs)
Rear wheel

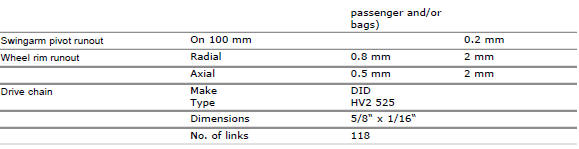
Rear suspension (diavel abs)

Rear suspension (diavel carbon abs)

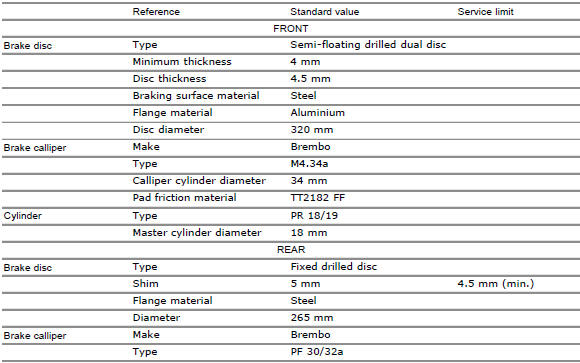
Hydraulic brakes

Charging system/alternator

Injection-ignition system

Fuel system

Injection system

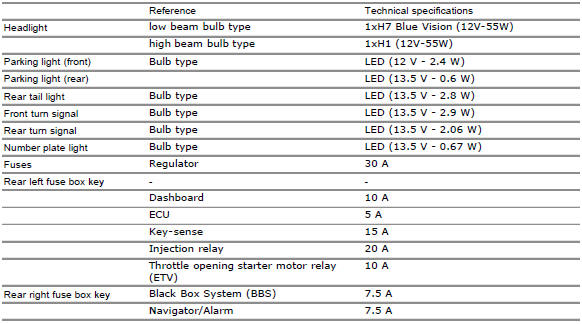
Lights/instrument panel

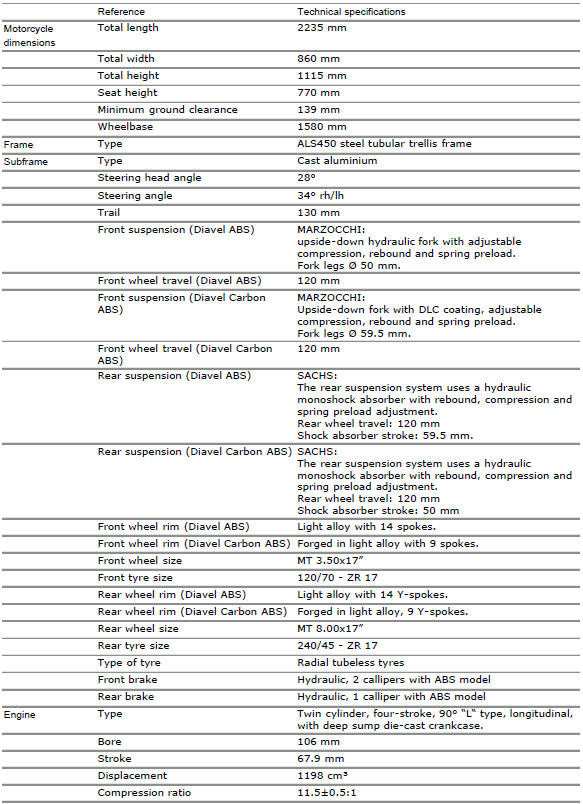
 Technical data
...
 Dimensions
...
Other materials:
Passive key
Introduction
The passive key (1) is used when the active key is not working correctly or
is not available.
The passive key works as a transponder, and must therefore be placed physically
onto the antenna to work.
The mechanical part (2) of the key is used to open the seat or the tank plug ...
Removal of the cylinder heads
Using the tool code 88713.2676, Undo the nuts (21) on the cylinder head stud
bolts.
Remove the cylinder head nuts (21) and special washers (22).
Remove the cylinder head assembly by lifting it off the engine studs.
Repeat the same procedure for the other cylinder head. ...
Passenger grabhandle
Passenger grabhandle (1, fig. 107) Is located inside the tail
guard; to take it out, remove the seat (see "removal of the
seat" on page 119), pull the knob (2, fig. 107) While taking out
the grabhandle (1, fig. 107) From its housing until it is fully
extended.
Warning
Before use, pu ...