
Ducati Diavel Owners Manual: Distance travelled on fuel reserve: trip fuel
This function shows the distance travelled on fuel reserve (in km or miles depending on the specific application).
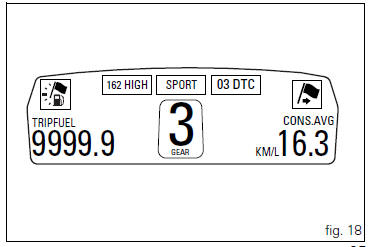
When the fuel light comes on, the display automatically switches to the "trip fuel" indicator.
Trip fuel reading remains stored even after key-off until the vehicle is refuelled.
Count is interrupted automatically as soon as fuel is topped up to above minimum level.
When the reading exceeds 9999.9, It is reset and the count restarts automatically.
 Trip 2 meter
This function shows the distance travelled since the trip
meter was last reset (in km or miles depending on the
specific application).
Holding the button (1, fig. 14) ?
pressed for 3 seconds
w ...
 Indicator cons. Avg - average fuel consumption
This function indicates the "average" fuel consumption.
The calculation is made considering the quantity of fuel used and
the km travelled since the last trip 1 reset. When trip 1 is res ...
Other materials:
Reassembly of belly fairing
Position the oil cooler shield (7) inserting the tab (a) into the slit (b) in
the electrical components support (s).
Note
On refitting, make sure that the tab (c) remains positioned under the
retainers (d) of the shield (7).
Fit clips (11) on bracket (13) and orient them as shown in the f ...
Technical specifications
General
Colours
Transmission
Timing system/valves
Crankshaft
Cylinder/piston
Gearbox
Cooling system
Front wheel
Front suspension (diavel abs)
Front suspension (diavel carbon abs)
Rear wheel
Rear suspension (diavel abs)
Rear suspensio ...
Low hands free key (hf) battery level
The activation of this (amber yellow) "warning" indicates
that the hands free system has detected that the battery
that permits the active key (1, fig. 62) To communicate and
turn the vehicle on is almost discharged.
Note
In this case, ducati recommends replacing the battery
as soon ...