
Ducati Diavel Service Manual: Overhaul of the cylinder barrel/piston components
Overhauling the cylinder
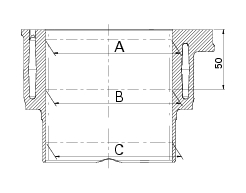
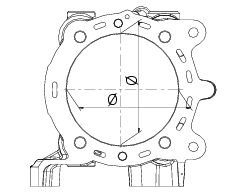
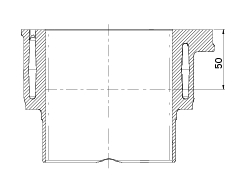
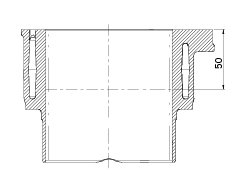
Check that the walls of the cylinder bore are perfectly smooth. Measure the cylinder bore diameter at 50 mm from the top face and determine the size class to which it belongs in accordance with the values specified in sect. 3 - 1.1Cylinder/piston. Repeat measurement of the diameter at three heights a (10 mm from the upper surface), b (50 mm from the upper surface) and c (100 mm from the upper surface) and in two direction at 90 between them; check that the measurements of taper and ovality in the bore fall within the range specified in sect. 3 - 1.1, Cylinder/piston.
In the event of damage or excessive wear the barrel must be renewed as it has a silicon carbide coating (which provides the cylinder walls with excellent anti-friction and anti-wear properties) and therefore cannot be rebored.
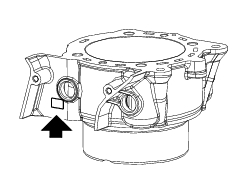
The cylinder barrels are marked with letters (stamped between two oil return ways) indicating their size class.
Always match cylinders with pistons from the same size class.
Overhaul of the piston
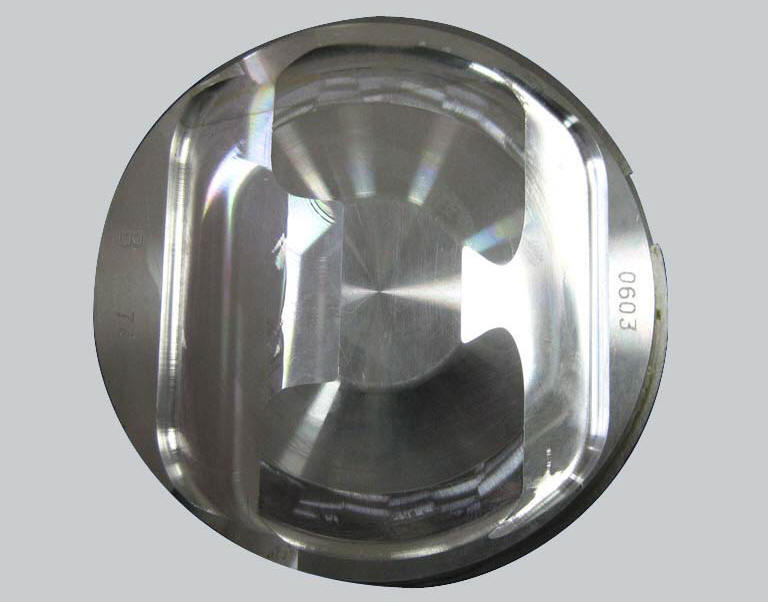
Clean the piston crown and piston ring grooves, removing any carbon deposits.
Inspect the piston and check its dimensions carefully: there must be no signs of scuffing, scoring, cracks, or other damage.
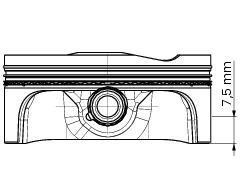
The piston diameter must be measured at 7.5 Mm up from the bottom of the skirt and in perpendicular direction to the pin axis.
The pistons must always be renewed as a pair.
Checking the piston-cylinder clearance
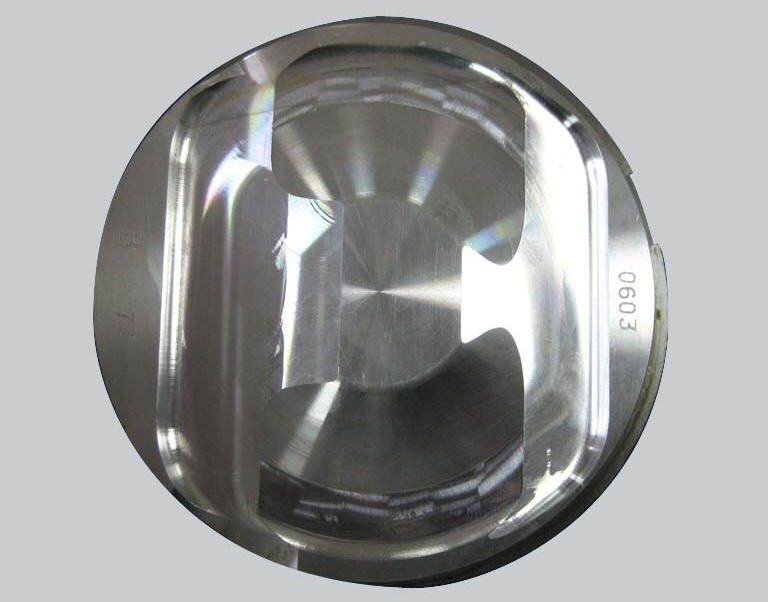
The pistons are marked with a letter (punched into the piston crown) that indicates the size class to which they belong.
Always match cylinders with pistons from the same size class.
The prescribed values are given in sect. 3 - 1.1, Cylinder/piston.
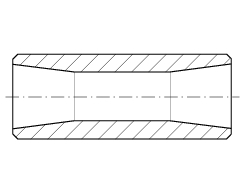
Overhauling the gudgeon pins
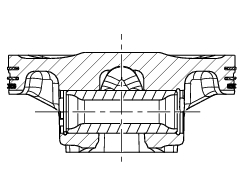
Gudgeon pins must be perfectly smooth without signs of scoring, steps, or blueing due to overheating. The well-lubricated gudgeon pin must slide smoothly inside the piston without stiffness.
Coupling clearance values with the piston and the connecting rod, see sec. 3 -1.1, Cylinder/piston.
If a new gudgeon pin is fitted, you must also change the connecting rod small end bush.
Overhauling the piston rings
The piston rings must not show any signs of scuffing or scoring. Replacement pistons are supplied complete with piston rings and gudgeon pin.
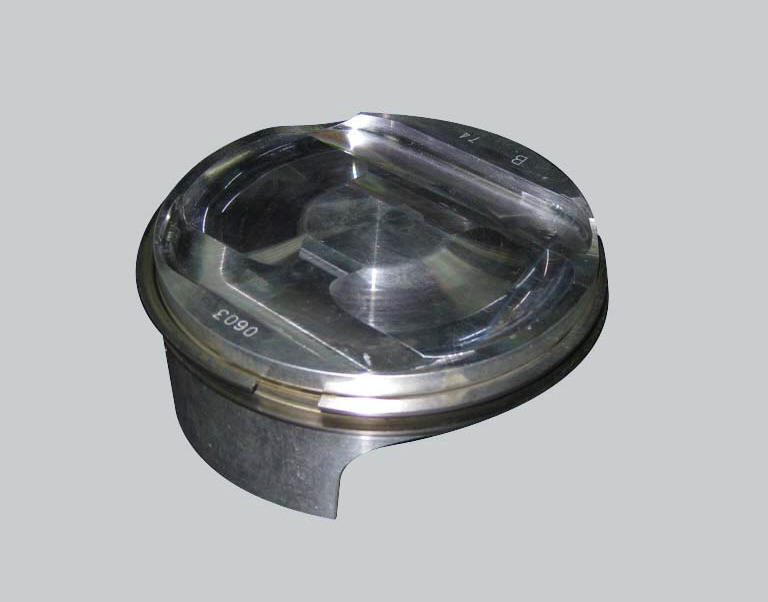
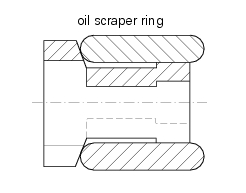
Checking the piston ring-grooves clearance
The maximum permissible wear limit is 0.15 Mm for the top segment (1st) and 0.10 Mm for the others (2nd and oil scraper ring).
The piston rings must always be installed with markings facing upwards.
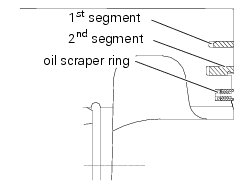
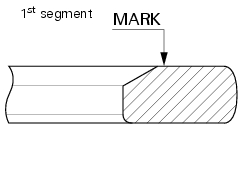
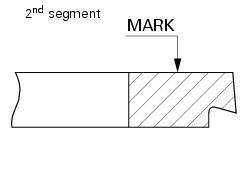
Checking the piston ring/cylinder clearance
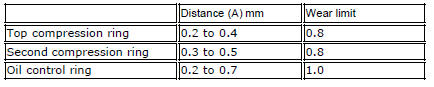
Insert the ring in the cylinder bore so that it is positioned 50 mm from the top face of the cylinder barrel; make sure that the ring is positioned perfectly square to the cylinder walls by checking with a gauge at several points around the ring that the top surface of the ring is exactly 50 mm from the top face of the cylinder barrel.
Measure the piston ring gap (a):
 Removal of the cylinder/piston assembly
Loosen the clamps (7) and remove the hoses (8) and (9) from the cylinder
barrels (10) and from the alternator-side
crankcase cover.
If damaged, unscrew the unions (6).
Note
T ...
 Refitting the cylinder/piston assembly
If new units are used, it is necessary to couple the cylinders and pistons of
the same selection (see paragraph "overhaul Of the cylinder
barrel/piston components" of this section).
If the pist ...
Other materials:
Primary drive gears
Clutch drum/primary drive gears
Spacer
Threaded ring nut
Lock washer
Spare parts catalogue
Diavel abs clutch
Diavel abs connecting rods
Diavel carbon
abs
clutch
Diavel carbon
abs
connecting rods
Important
Bold reference numbers in this section identify parts not shown in th ...
Disassembly of the clutch cover
Remove the plug (14) and its o-ring (13), the plug (17) and its o-ring (15)
from the cover.
Undo the fixing screw (16) of the inner cover (19).
Remove the inner cover (6) and soundproofing panel (18).
Remove the circlip (10) and withdraw the shim (9) and the sealing ring (8).
The dri ...
High beam lights not working
Fault codes
The hi beam light on the (slave) dashboard flashes at 1hz frequency.
Wiring diagram
Location of elements on motorcycle
(A) injection relay; (b) etv relay (throttle valve operating engine); (c)
radiator fan relay; (d) hands free relay.
Fuses located at the rear left of the ...