
Ducati Diavel Owners Manual: Trip 1 meter
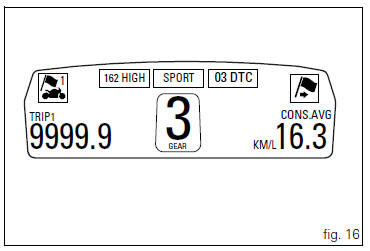
This function shows the distance travelled since the trip meter was last reset (in km or miles depending on the specific application).
Holding the button (1, fig. 14) 
pressed for 3 seconds
when this function is displayed resets the trip meter.
When the reading exceeds 9999.9, Distance travelled is reset and the meter automatically starts counting from 0 again.
If the system measurement units are changed at any moment through the "set units" function of the setting menu, or if there is an interruption in the power supply (battery off), the distance travelled is reset and the count starts from zero (considering the newly set unit of measurement).
 Note
Note
When this value is reset, also the "average fuel consumption", "average speed" and "trip time" functions are reset.
 Total distance covered indicator: "odometer"
This function shows the total distance covered by the vehicle
(in km or miles depending on the specific application).
At key-on the system automatically enters this function.
The odometer readi ...
 Trip 2 meter
This function shows the distance travelled since the trip
meter was last reset (in km or miles depending on the
specific application).
Holding the button (1, fig. 14) ?
pressed for 3 seconds
w ...
Other materials:
Warning indication (alarms/signals)
The instrument panel activates in real-time some warnings /
malfunction that are not dangerous for the correct operation
of the vehicle.
At key-on (at the end of the check) one or more "warnings"
are displayed if they are active.
When a "warning" is triggered, the indica ...
Reassembly of the cylinder head
The exhaust side can be identified by the three threaded holes on the flange.
The intake side can be identified by the presence of four threaded holes on
the flange.
All the photos in this chapter refer to a vertical cylinder head.
Valve guide sealing rings
Position the cylinder head o ...
Running-in recommendations
Maximum rpm (fig. 114)
Rotation speed for running-in period and during standard use
(rpm)
Up to 1000 km;
From 1000 to 2500 km.
Up to 1000 km
During the first 1000 km, keep an eye on the rev counter.
It should never exceed
5500÷6000 rpm.
During the first hours of riding, it ...