
Ducati Diavel Service Manual: Dashboard
Note
The dashboard is supplied as a single component; its internal components cannot be renewed separately.
Important
Whenever the dashboard is renewed, the ignition key programming procedure must be repeated.
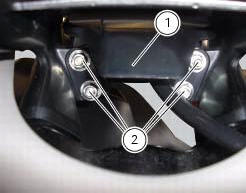
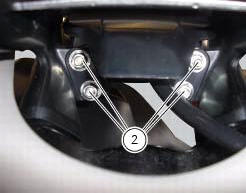
Loosen the nuts (2) to remove the master dashboard (1) from its seat and disconnect the connector (a) of the main wiring.
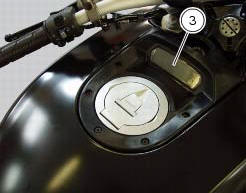
To remove the slave dashboard (3) remove the front tank fairing as indicated in sect. 5 - 2, "Removal of the fuel tank fairings".
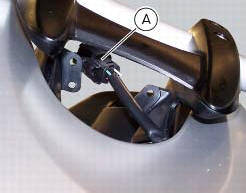
Refitting is the reverse of removal; be sure to check that the dashboard is mounted on its support with the screws (4) tightened to a torque of 3 nm +/- 10% (sect. 3 - 3, Frame torque settings).
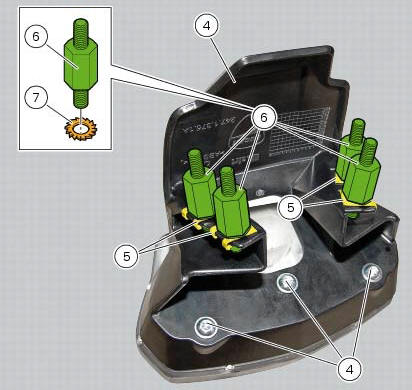
Check the presence of clips (5) and stud bolts (6) with washers (7). The stud bolts (6) must be tightened to a torque of 2 nm +/- 10% (sect. 3 - 3, Frame torque settings).
Tighten the nuts (2) to a torque of 3 nm +/-10% (sect. 3 - 3, Frame torque settings).
 Instruments
...
 Dashboard system
The vehicle is equipped with two dashboards: an lcd (1) located on the
handlebar containing the key indications (speed,
rpm, engine coolant temperature, and clock) and a tft colour display (2) loca ...
Other materials:
Removal of the expansion tank
Loosen the clamp (6), open the hose guide (a) and slide the hose (7) out of
the radiator.
Open clamps (14) and release the hoses that pass through them.
Loosen the screws (16).
Remove the tank (12) with its hoses (7) and (20) and the support (15).
Loosen the clamp (19) to r ...
Removal of the front footrests
Note
The removal of the front footrests is described only for the right one (2)
but it is the same also for the left one.
Remove the circlip (5) by releasing the pin (3).
Slide the pin (3) off the frame by supporting the footrest (2).
Slide off the footrest (2) from its seat and collect th ...
Checking and adjusting timing belt tension
Note
The on-screen icons used during this procedure are explained in a table at
the end of this section.
Note
This operation, which is performed using the dds diagnosis instrument, has
the advantage that it can be carried out on
both timing belts with the engine still installed on the frame. ...