
Ducati Diavel Owners Manual: Lubricating cables and joints
Check the outer sheath of the throttle control and cold start lever cables for damage at regular intervals. The outer plastic cover should not be flattened or cracked. Operate the controls to make sure the inner cables slide smoothly inside the outer sheath: if you feel any friction or catching, have the cable replaced by a ducati dealer or authorised service centre.
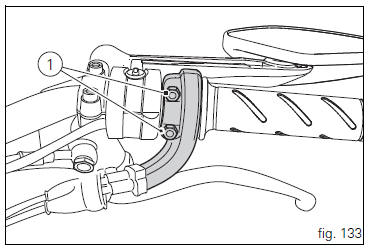
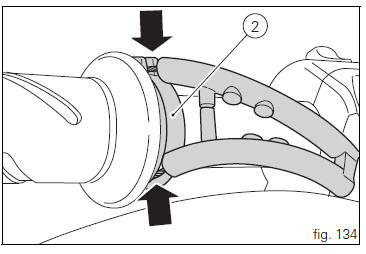
To avoid this kind of problem with the throttle cable, unscrew the two retaining screws (1, fig. 133) To open the case and then the grease cable ends and pulley (2, fig. 134) With shell advance grease or retinax lx2 grease.
 Warning
Close the twistgrip housing carefully, inserting the cable in the pulley.
Refit the housing and tighten the screws (1) to 10 nm.
To ensure smooth operation of the side stand pivot, remove dirt and apply shell alvania r3 grease to all friction points.
 Checking brake pads for wear
Check brake pads wear through the inspection hole in the
callipers.
Change both pads if friction material thickness of even just
one pad is about 1 mm.
Warning
Friction material wear beyond th ...
 Adjusting throttle control free play
The throttle twistgrip must have free play of 1.5×2.0 Mm in
all steering positions, measured on the outer edge of the
twistgrip. If necessary, adjust it using the adjusters (1 and 2,
fig. 135 ...
Other materials:
Maintenance indicator
This function indicates that the vehicle is about to or has
travelled a distance for which an authorised ducati service
centre should be contacted to have the general maintenance
or oil change performed.
Maintenance table
First warning - oil service 1000 km
The first warning is activated a ...
Throttle valve position sensor
Introduction
The throttle valve position sensor (tps) of the diavel is mounted on the
throttle body.
The sensor is integrated into the throttle valve actuator motor, which
turns the spindle of the vertical cylinder throttle
valve directly.
The sensor sends information to the engine con ...
Removal of the crankshaft/connecting rods assembly
After separating the crankcase halves, withdraw the crankshaft (6) complete
with connecting rods (2).
...