
Ducati Diavel Service Manual: Trip 1 meter
This function shows the distance travelled since the trip meter was last reset (in km or miles depending on the specific application).
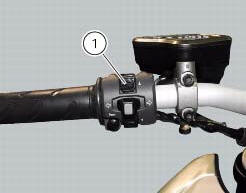
Press and hold (1) "s" for 3 seconds while in this function to reset the trip odometer.
When the reading exceeds 9999.9, Distance travelled is reset and the meter automatically starts counting from 0 again.
If the system measurement units are changed at any moment through the "units of measurement modification function" function of the setting menu, or if there is an interruption in the power supply (battery off), the distance travelled is reset and the count starts from zero (considering the newly set unit of measurement).
When this value is reset, also the "average fuel consumption", "average speed" and "trip time" functions are reset.
 Total distance covered indicator: "odometer"
This function shows the total distance covered by the vehicle (in km or miles
depending on the specific application).
At key-on the system automatically enters this function.
The odometer read ...
 Trip 2 meter
This function shows the distance travelled since the trip meter was last
reset (in km or miles depending on the specific
application).
Press and hold (1) "s" for 3 seconds while in this function ...
Other materials:
Hands free
Hands free
Special screw
Plug
Electric fuel plug
Button
Spring
Frame
Elastic pin
Spare parts catalogue
Diavel abs handlebar and controls
Diavel carbon
abs
handlebar and controls
Important
Bold reference numbers in this section identify parts not shown in the
figures a ...
Refitting the throttle twistgrip
Lubricate the ends of the throttle grip cables (10) and the twistgrip race
with the recommended grease.
The closing cable (10) features a writing on the yellow tube, whereas the
opening one (10) features such writing on the
white tube.
To refit the throttle control components, proceed i ...
Crankcase halves
Bearing
Bearing holder bushing
Alternator-side crankcase half
Bearing
Circlip
Washer
Bearing
Sealing ring
Bearing
Retaining plate
Screw
Screw
Clutch-side crankcase half
Sealing ring
Bearing
Circlip
Bearing holder bushing
Bearing
Plug
Screw
Spacer
Bush ...