
Ducati Diavel Owners Manual: Checking drive chain tension
 Important
Have chain tension adjusted by a ducati dealer or authorised service centre.
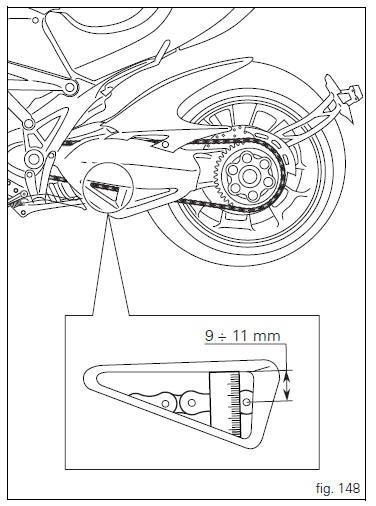
Make the rear wheel turn until you find the position where chain is tightest.
Set the vehicle on the side stand. Push down the chain at the point of measurement and release.
Measure the distance between the "aperture" upper profile and pin centre.
The read distance must be: 9 ÷ 11 mm.
Important
If the drive chain is too tight or too slack, adjust it so that tension reading will fall within specified range.
 Warning
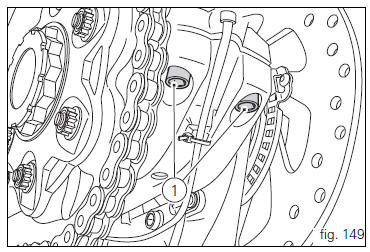
Correct tightening of screws (1, fig. 149) Is critical to rider and passenger safety.
 Important
Improper chain tension will lead to early wear of transmission parts.
 Charging and maintenance of the battery during winter Storage
Your motorcycle is equipped with a connector (1, fig. 147) To
which you can connect a special battery charger available
from our sales network.
...
 Chain lubrication
The chain fitted on your motorcycle has o-rings that keep dirt
out of and lubricant inside the sliding parts.
So as not to damage these seals when cleaning the chain,
use special solvents and avo ...
Other materials:
Overhaul of the flywheel-alternator assembly
Examine the inner part of alternator rotor (24) for signs of damage. Check
that the starter clutch is working properly and
that the needle races do not show signs of wear or damage of any kind. If there
is any malfunction, remove the whole
assembly.
Disassembling the generator flywheel
U ...
Operations to be carried out by the dealer
List of operations to be performed at 1000 km
Reading of the error memory with dds on the engine control units,
vehicle and abs
Change the engine oil
Change the engine oil filter
Check the indicators and lighting
Check the safety devices (side ...
Refitting the clutch transmission unit
Position pipe (4) on the clutch slave cylinder (r).
Position the two seals (19) and tighten the screw (18) to a torque of 23 nm +/-
10% (sect. 3 - 3, Frame torque settings).
Refit the bleed valve (17) and the dust gaiter (16).
To position the pipe retaining clamps (4) refer to the table on ...