
Ducati Diavel Service Manual: How to switch the dashboard on
The dashboard may switched on either from the on/off switch on the handlebar or from the button on the hands free system.
With the engine off, the on/off switch is turned to "run off".
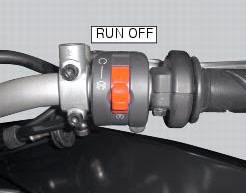
With the motorcycle and dashboard off, the on/off switch is turned to "run off".
To switch the dashboard on, press the on/off switch on the handlebar downward. When released, the switch automatically returns to the "run off" position. If the key is detected, the dashboard switches on and the electric steering lock is disengaged (if engaged previously).

Press the on/off switch on the handlebar downward. When released, the switch automatically returns to the "run off" position. If the key is detected, the dashboard switches on and the steering lock is disengaged (if engaged previously).
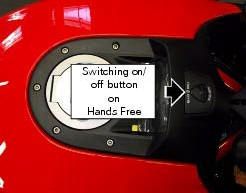
The dashboards may also be switched on with the on/off button on the hands free system. In this case you just have to press once the button located in the tank front side.
Note
In the usa version the door (1) is not present.
If the key is not detected within 10 seconds of switching the dashboard on, the dashboard switches off automatically.
 Operating principle
Introduction
The hands free system features two separate on/off buttons, either one of
which may be used as preferred by the rider.
For practical reasons, we recommend using the button on the ha ...
 How to start the engine
With the motorcycle off and the dashboard on, the on/off switch is turned to
"run off"
With the motorcycle and dashboard on, the on/off switch is turned to "run
off".
To start the engine, ...
Other materials:
Setting menu
This menu is used to enable/disable and set some
motorcycle functions.
To access the "setting menu" press the button (2, fig. 14)
? for 3 seconds.
Note
When within this menu no other function can be
displayed.
Important
For safety reasons, the setting menu can only be
ac ...
Overhauling the front forks
Note
It is advisable to loosen the top cap (14) when the fork is still fitted
to the motorcycle.
Note
The specific tools for the revision of the fork, are described in sect. 3
- 4, Specific tools for the frame.
Loosen the spring preload adjuster before unscrewing the plug (14).
Unscrew th ...
Refitting the number plate holder
Place the number plate light (5), as indicated, on the number plate holder
plate (8) and tighten the screws (7) to a torque
of 2 nm +/- 10% (sect. 3 - 3, Frame torque settings).
Thread the number plate light wiring (c) into the opening in the number plate
holder plate as shown.
Fit ...