
Ducati Diavel Service Manual: Removal of the fuel tank

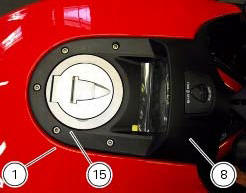
On the usa version remove the canister filter as indicated in sect. 8 - 10, "Removal of the evaporative emissions canister".
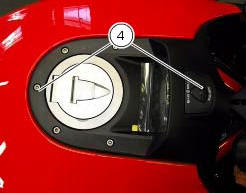
Loosen and remove the front retaining screw (4)
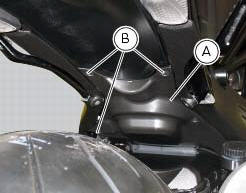
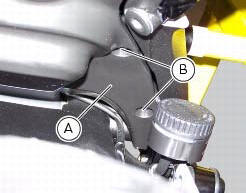
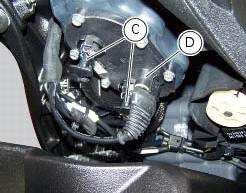
Remove the flange cover (a) by loosening the screws (b), disconnect the quick-release fittings (c) from the flange, and connector (d) of the fuel level sensor from the main wiring.
On both sides of the tank plug, paying attention not to damage them, slide out the two breather pipes (8) and (15).
Remove the tank (1).
 Fuel tank
fuel tank
Rubber pad
Spacer
Screw
Hose
Tray
Y-fitting
Hose
Hose
Filler cap
Screw
Complete hose guide
Screw
Hose clip
Hose
Screw
Screw
Sealing washer
Screw
...
 Removal of the fuel tank filler cap
Remove tank covers (sect. 5 - 2, Removal of the fuel tank fairings).
Remove hoses (8) and (15) from the filler cap assembly (10).
Open the filler cap.
Unscrew the outer screws (17) securing ...
Other materials:
Gearchange mechanism
Return spring
Washer
Special screw
Gear pawl assembly
Interlock plunger holder
Sealing washer
Detent ball spring
Ball
Circlip
Selector claw return spring
Shim washer
Ring
Nut
Selector drum control fork
Gearchange lever pin
Shaft with gearchange lever arm
Gearch ...
Disassembly of gear interlock plunger and pawl assembly
Unscrew the interlock plunger screw (5) and remove the seal (6), spring (7)
and the detent ball (8).
Unscrew the clutch-side crankcase half screw (3) and remove the pawl (4),
washer (2) and spring (1).
...
Removal of the primary drive gear
Withdraw the clutch housing (1) complete with driven gear of the primary pair
(a).
Remove the inner spacer (2).
Remove the oil pump (d) (sect. 9 - 2.1, Removal of the oil pump).
Lock the primary pinion (b) with the holding tool 88713.3417 And loosen the
threaded ring nut (3) u ...