
Ducati Diavel Service Manual: Removal of the tail light

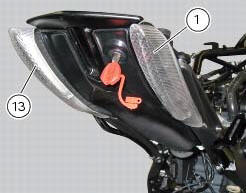
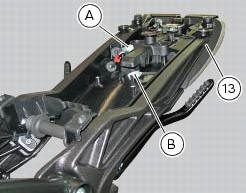
Disconnect the connectors (a) and (b) of the tail lights (1) and (13).
Loosen the screws (4) and slide the tail lights (1) and (13) to the rear side; recover the four spacers (3) and the washers (14).

 Refitting the number plate holder
Place the number plate light (5), as indicated, on the number plate holder
plate (8) and tighten the screws (7) to a torque
of 2 nm +/- 10% (sect. 3 - 3, Frame torque settings).
Thread the numbe ...
 Refitting the tail light
Fit the spacers with collar (3) into the rear vibration dampers (2) located
on the gloves compartment (23).
Note
Two spacers (3) must be inserted inside and outside on the right side and
two spa ...
Other materials:
Removal of the swingarm
Before removing the parts in question, you must first carry out the following
operations:
Remove the rear wheel eccentric hub as described in chapter "removal of the
rear wheel eccentric hub and rear wheel
shaft" of this section.
Loosen screws (7) and remove the hose grommets (13), (15) ...
Scheduled maintenance chart
Operations to be carried out by the dealer
List of operations to be performed at 1000 km
Reading of the error memory with dds on the engine control units, vehicle and
abs
Change the engine oil
Change the engine oil filter
Check the indicators and lighting
Check the safety devices (side stand ...
Primary drive gears
Clutch drum/primary drive gears
Spacer
Threaded ring nut
Lock washer
Spare parts catalogue
Diavel abs clutch
Diavel abs connecting rods
Diavel carbon
abs
clutch
Diavel carbon
abs
connecting rods
Important
Bold reference numbers in this section identify parts not shown in th ...