
Ducati Diavel Service Manual: Changing the engine oil and filter cartridge
Note
This operation has to be carried out with hot engine (but turned off) because the oil in these conditions is more fluid and its evacuation is faster and complete.
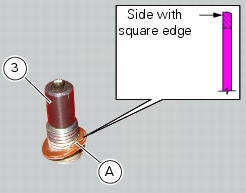
Remove the drain plug (3) with seal (a) from the oil sump and allow the oil to drain off.
Warning
Dispose of oil and/or filter cartridges in compliance with environmental protection regulations.
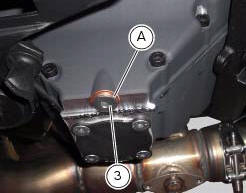
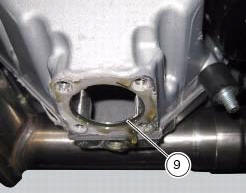
Remove any metallic deposits from the end of the magnetic drain plug (3). Clean the threads of the drain plug and apply three bond tb1215. Refit the drain plug complete with gasket (a) to the sump.
Position seal (a) so that the side with the square edge is facing the chain side crankcase half.
Tighten the exhaust plug (3) to a torque of 20 nm (min. 18 Nm - max. 22 Nm) (sect. 3 - 3, Engine torque settings).
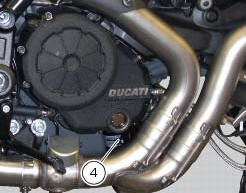
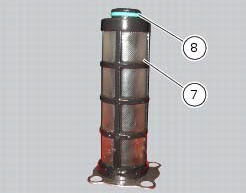
Remove the oil sump filter cartridge (4) using service tool 88713.2906.
Important
Dispose of the used cartridge, do not attempt to reutilise it.
Fit a new cartridge (4), using the tool 88713.2906 Making sure to lubricate the gasket with engine oil.
Note
As an alternative, it is advisable to refill the filter cartridge with engine oil (4) before fitting it: this enables the recommended oil level to be maintained without topping up.
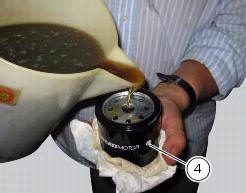
Screw the cartridge fully home and tighten it to a torque of 11 nm (min. 10 Nm - max. 12 Nm) (sect. 3 - 3, Engine torque settings).
Every two oil changes, clean the oil pickup gauze filter.
Undo the four screws (5) of the external cap (6) and remove it.
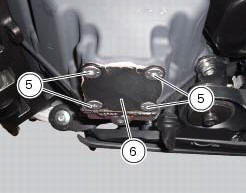
Remove the filtering element (7) and check the o-rings (8) and (9), replace them if necessary.
Clean the filter with petrol and compressed air. Take care not to damage the gauze.

Place the o-ring (9) on the crankcase and the (8) one on the mesh filter (7).

Refit the mesh filter (7).
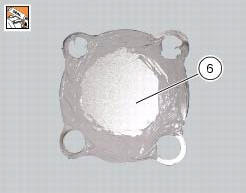
Apply a bead of fluid gasket to the cap (6) as shown in the figure.

Remove the filler plug (2) and carry out refilling with the specified oil type (sect. 3 - 2, Fuel, lubricants and other fluids) up to reaching the notch that identifies the max level in the sight glass (1).
Refit the filler cap (2). Run the engine at idle speed for a few minutes.
Check that there are no oil leaks and that the engine oil pressure warning light on the dashboard switches off some seconds after starting up the engine. If not, switch off the engine and trace the fault.
After a few minutes, check that the oil level is the specified one; if necessary, restore the max. Level.
Tighten the external cap (6) retaining screws (5) to a torque of 10 nm (min. 9 Nm - max. 11 Nm) (sect. 3 - 3, Engine torque settings).

 Check engine oil level
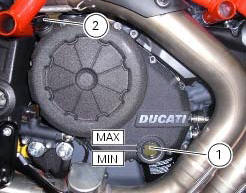
Check the engine oil level through the sight glass (1) on the right-hand side
of the oil sump.
Stop the engine and allow a few minutes for the oil to settle to a steady level.
Oil level must b ...
 Checking valve clearances
To check the valves clearance, it is necessary to have access to the cylinder
head covers and then remove the
components listed below.
Unscrew the two fixing screws (1) of the cover (2) accord ...
Other materials:
Check engine oil level
Check the engine oil level through the sight glass (1) on the right-hand side
of the oil sump.
Stop the engine and allow a few minutes for the oil to settle to a steady level.
Oil level must be checked with the vehicle perfectly upright and the engine
cold.
The oil must be between the m ...
Refitting the camshafts
If the stud bolts (2) were removed, apply the recommended threadlocker to the
short end of the stud bolts (2), i.E. The
end that is to be screwed into the cylinder head. Tighten the stud bolts (2) to
a torque of 10 nm (min. 9 Nm - max. 11
Nm) (sect. 3 - 3, Engine torque settings).
Check t ...
Replacing the rear phonic wheel sensor
Disconnect the rear abs sensor (5) connector (c) from the main electric
wiring.
Open all the retainer clamps of the rear abs sensor cable (5): refer to table of
sect. 7 - 6, Flexible wiring/hoses
positioning.
Remove the rear abs sensor (5) from its seat on the rear calliper mounting ...