
Ducati Diavel Service Manual: Overhauling the front forks
Note
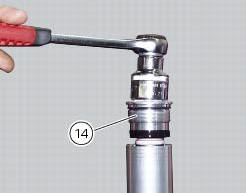
It is advisable to loosen the top cap (14) when the fork is still fitted to the motorcycle.
Note
The specific tools for the revision of the fork, are described in sect. 3 - 4, Specific tools for the frame.
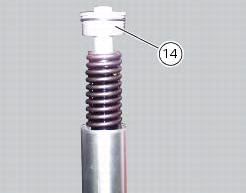
Loosen the spring preload adjuster before unscrewing the plug (14).
Unscrew the top cap (14) complete with the rebound damping adjuster.
Disassembly of the front fork
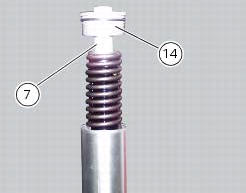
Restrain the counter nut (7) with a hex wrench.
Using another hex wrench, unscrew and remove the plug (14), with its seal, from the cartridge (8).
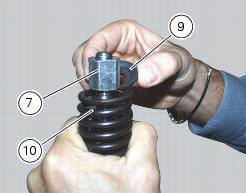
Unscrew the counter nut (7) up to the final threads on the damper (8).

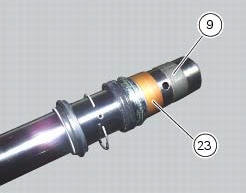
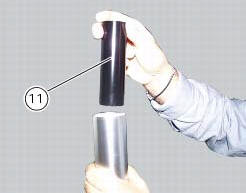
While restraining the spring (10) with one hand, withdraw the bush (9) sideways and then slowly release spring (10).
Slide off the spring (10).
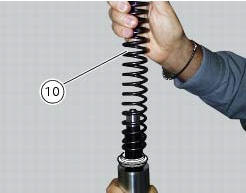
Slide off the preload tube (11) and recover the washer (16).

Drain the oil from inside the leg by pumping with the outer tube (24) and the damper cartridge (8).
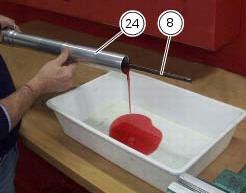
Warning
This movement generates pressure so that the oil will be rapidly expelled from the fork leg.
Aim the jet of oil into a previously prepared container and avoid contact with fork oil.
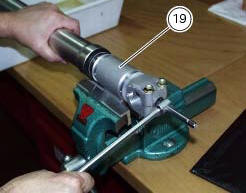
Block the fork tube/calliper unit (19) with a vice provided with protection jaws
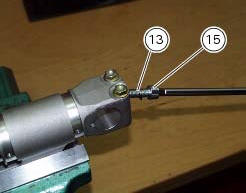
Unscrew the compression damping adjuster (15).
Remove the adjuster screw (15) and recover the seal (13).
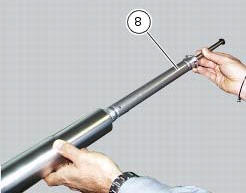
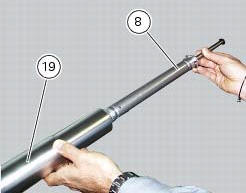
Withdraw the damper assembly (8).
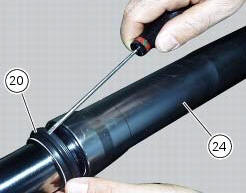
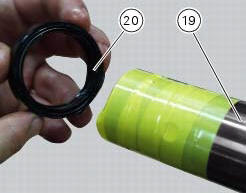
Slip the dust seal (20) off the outer tube (24), prising it off with a screwdriver.
Remove the circlip (22).
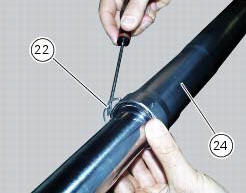
Important
Take care not to damage the fork tube - calliper unit (19) and the seat of snap ring (22) in the outer tube (24).
To separate the outer tube (24) from the fork tube - calliper unit (19), pull sharply outwards repeatedly to gradually displace the bottom bush (23).
Insert the tip of a screwdriver in the slit in the bush (25) and open it up sufficiently to slide the bush off the fork tube - calliper unit.
Remove the following parts from the inner fork tube:
- Bottom bush (23);
- Collar (12);
- Sealing ring (21);
- Circlip (22);
- Dust seal (20).

Inspection of the front fork
Place the spring on a flat surface and measure the free length (l).
Service limit: 270 mm.
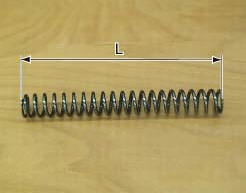
Renew the spring if the length is not within the specified limit.
Inspect the outer surfaces of both fork inner tubes and the internal surfaces of both outer tubes. They must be free from scoring, steps, or dents.
Check that the outer tubes are straight: maximum allowed error 0.10 Mm.
Whenever the inner tube is removed from the sleeve it is good practice to renew the bottom bushes (9) and (23).
Check the collar (12) for distortion in the area indicated. Renew if distorted.
Reassembly of the front fork
Lock the fork tube - calliper unit.
Protect the end of the unit with tape.
Important
Before installation, smear the sliding edges of sealing ring (21) with fork oil or oil seal grease.
Install the sealing ring (21) with the marked surface facing the dust seal (20).
Install the following components in the fork tube - calliper unit (19):
- Dust seal (20);
- Circlip (22);
- Sealing ring (21);
- Collar (12);
- Bottom bush (23);
- Bottom bush (25).

Note
Before assembling the fork tube - calliper unit with the outer tube, lubricate the bush sliding surfaces with fork oil.
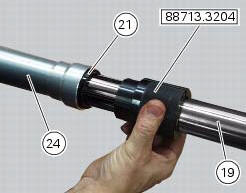
Push the bottom bush (23) and the cap (12) into the external sleeve (24) using the sealing ring tool (f, part no. 88713.3204).
Drive the oil sealing ring (21) into the outer tube using the same tool.
Fit the circlip (22) and the dust seal (20).
Important
The outer tube must freely slide on the fork tube - calliper unit. Only support the sliders and the outer sleeve with your hands to avoid damaging the sealing rings and the bottom bushes.
Insert the cartridge assembly (8) in the fork tube - calliper unit (19), screwing the tool 88713.3203 Onto the cartridge.
Install the gasket (13) and the compression set screw (15) and tighten to the torque (sect. 3 - 3, Frame torque settings).

Insert half of the prescribed quantity of oil in each fork leg (sect. 3 - 2, Fuel, lubricants and other fluids).
Pump with tool 88713.3203 To force the oil to fill internal volume completely.
Slide both the damper and outer tube fully down the inner tube.
Pour the remaining oil into the fork leg and measure the oil level.
Important
Keep the fork leg vertical when measuring the oil level. Make sure the oil level is the same in both fork legs.
Recommended oil: shell advance fork 7.5 Or donax ta standard capacity: 0.480 Dm3 for each fork leg.
Standard oil level: 104 mm.
The quantity of oil affects fork response during the final part of the compression stroke.
High oil level increases compression loading, low oil level will decrease it.
Clean off any oil from the spring (10) and the counter nut (7) before refitting.
Fit the following components: the washer (16) and the preload tube (11).
Insert the spring (10), bush (26) and counter nut (7), with the conical side facing counter nut (23) and washer (8).

Screw the counter nut (7) onto the damper (8) with a wrench.
Using

Using the same wrench, restrain the counter nut and screw the top cap (14) complete with the o-ring onto the damper (8).
Tighten the upper plug (14) to the specified torque (sect. 3 - 3, Frame torque settings).
 Removal of the front forks
Before removing the front forks, it is first necessary to remove the
following parts:
Loosen the clamp screws (1) holding the fork legs to the steering head (3).
Loosen the clamp screws (2) and ...
 Refitting the front forks
Refit the fork legs, positioning them at the height shown in the figure
relative to the upper surface of the bottom yoke.
Warning
The difference in height between the two fork legs must be no ...
Other materials:
Checking and adjusting timing belt tension
Note
The on-screen icons used during this procedure are explained in a table at
the end of this section.
Note
This operation, which is performed using the dds diagnosis instrument, has
the advantage that it can be carried out on
both timing belts with the engine still installed on the frame. ...
Checking the coolant level
To the specified intervals in the "scheduled maintenance chart" (sect. 4 - 2)
Check the coolant level contained in
the expansion reservoir, on the right side of the vehicle.
The coolant level must be between the max. And min marks on the tank.
If the level is low, top up with the recommende ...
Reassembly of the tool tray
Place the tool tray unit (23) on the lateral brackets (2) and (3) by
tightening the screws (24) to 14 nm +/- 5% (sect. 3-3,
Frame torque settings).
If the handle guide (32) has been previously removed, position it on the tray
(23) and tighten the screws (34) to 20 nm
+/- 5% (sect. 3-3, Fram ...