
Ducati Diavel Service Manual: Refitting the radiator
The reassembly procedure is the same for both radiators.
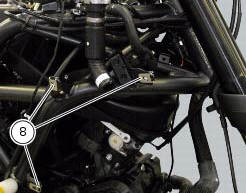
Check for the nuts with clips (8).
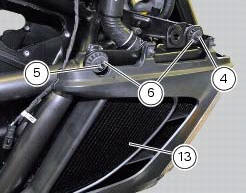
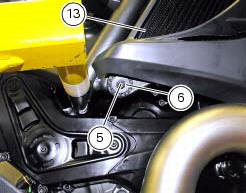
Refit the rh radiator (13) on the frame and tighten the screws (4) and (5) with the spacers (6) to a torque of 10 nm +/-10% (sect. 3 - 3, Frame torque settings).
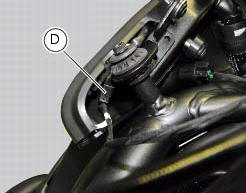
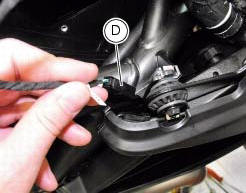
Connect the connections of wiring (d) to the front turn indicators.
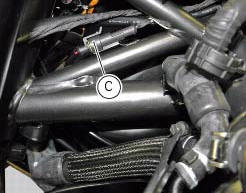
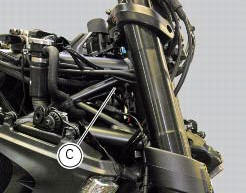
Reconnect the electro-fan wiring of the radiators to the main wiring (c).
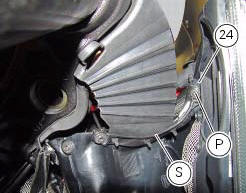
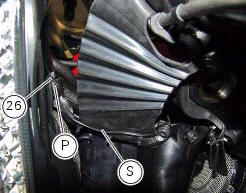
Once both radiators have been mounted, join the two internal air ducts (24) and (26) by tightening the screws (30) to a torque of 4 nm +/- 10% (sect. 3 - 3, Frame torque settings).
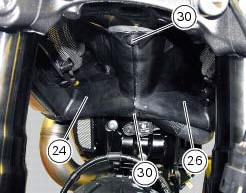
Fix supports (s) of the front splashguard to the air ducts (24) and (26) by tightening the screws (p) to a torque of 4 nm +/- 10% (sect. 3 - 3, Frame torque settings).
 Reassembling the water radiator unit
The procedure is the same for both radiators.
Check the presence of clips (1) at the positions of the external coolant
radiator cover (23).
If removed, fit the front turn indicator (32) on the ...
 Water pump
Screw
Washer
Circlip
Water pump outlet union
Bearing
bearing
Spacer
Aluminium gasket
Mechanical seal
Water pump impeller
Bush
Water pump cover assembly
Screw
Plug
Se ...
Other materials:
Steering angle adjustment
Loosen the nuts (17) and adjuster screws (16) on both sides of the bottom
yoke.
Use a 6 to 6.5 Mm spacer (a) fitted to the fork outer tube, or use a gauge.
Turn the front forks to the right until the spacer (a) is seated against the
frame top tube.
Tighten the adjuster screw (16) to ...
Removal of the starter motor idler gear
Slide the gear pin (21) complete with the gear (19) and washer (20).
Warning
Pay attention to the washer (20) since it may fall inside the
crankcase half.
At this point, it is possible to remove the starter motor as described in
sect. 6 - 3, Starter motor. ...
Units of measurement modification function
This function allows you to change the units of measurement of the displayed
values.
To access the function it is necessary to view the ""setting" menu", using
buttons (1) "s" or (2) "t" to select the "set
units" function and press the reset button (3) to enter the following page.
Use but ...