
Ducati Diavel Service Manual: Removal of the front wheel
Support the bike so that the front wheel is raised from the ground.
Remove the front brake calliper (b) by unscrewing the two screws (a) securing the calliper to the fork leg; do not disconnect the calliper from the hose.

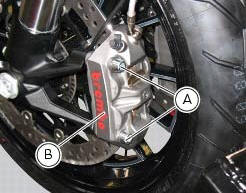
Warning
Do not operate the brake lever when the callipers are removed. This can cause the brake pistons to be expelled.
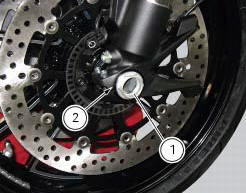
Loosen and remove the nut (1) on left side of the wheel shaft.
Recover the washer (2).
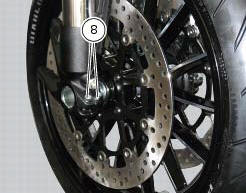
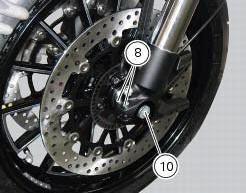
Loosen the wheel shaft screws (8) on the fork legs.
Working from the left-hand side, use a plastic mallet to drive the axle (10) out from the opposite side and remove it.
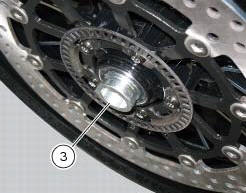
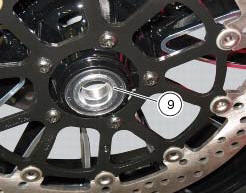
Remove the wheel and recover the spacers (3) and (9).
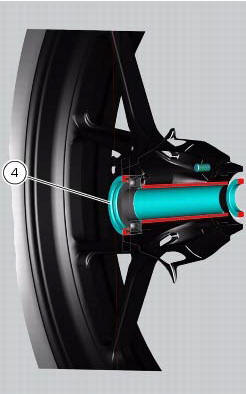
Working from both sides, remove the oil sealing ring (4).
 Front wheel
Nut
Washer
Left spacer
Sealing ring
Bearing
Front wheel rim
Inner spacer
Screw
Right spacer
Front wheel shaft
Valve
Spare parts catalogue
Diavel abs front and rear wheel ...
 Overhauling the front wheel
Wheel bearings
Before checking the dimensions, check the wear on wheel bearings. Check for
wear by hand after cleaning and degreasing
the bearings in their seats.
Turn the inner race.
Check ...
Other materials:
Reassembly of the tool tray
Place the tool tray unit (23) on the lateral brackets (2) and (3) by
tightening the screws (24) to 14 nm +/- 5% (sect. 3-3,
Frame torque settings).
If the handle guide (32) has been previously removed, position it on the tray
(23) and tighten the screws (34) to 20 nm
+/- 5% (sect. 3-3, Fram ...
Parking
Park the stopped motorcycle on the side stand.
Turn the handle completely to the left or right.
If this operation is performed within 60 seconds after the
engine stop, the message "waiting for lock" (fig. 120) Will
appear on the display of the instrument panel for approx.
5 Seco ...
Crankshaft/connecting rods assembly
Special screw
Connecting rod assembly
Half bearing
Grub screw
Bushes
Crankshaft
Grub screw
Shim washer
Spare parts catalogue
Diavel abs connecting rods
Diavel carbon
abs
connecting rods
Important
Bold reference numbers in this section identify parts not shown in the
f ...