
Ducati Diavel Service Manual: Removal of the tail light

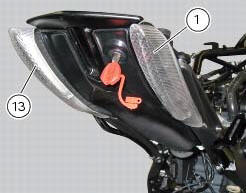
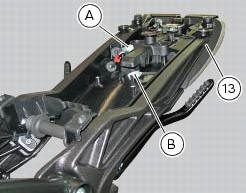
Disconnect the connectors (a) and (b) of the tail lights (1) and (13).
Loosen the screws (4) and slide the tail lights (1) and (13) to the rear side; recover the four spacers (3) and the washers (14).

 Refitting the number plate holder
Place the number plate light (5), as indicated, on the number plate holder
plate (8) and tighten the screws (7) to a torque
of 2 nm +/- 10% (sect. 3 - 3, Frame torque settings).
Thread the numbe ...
 Refitting the tail light
Fit the spacers with collar (3) into the rear vibration dampers (2) located
on the gloves compartment (23).
Note
Two spacers (3) must be inserted inside and outside on the right side and
two spa ...
Other materials:
Tail light - number plate holder
Rh tail light
Vibration damper mount
Spacer
Screw
Number plate light
Screw
Screw
Plate
Number plate holder
Nut
Screw
Rear chain guard
Lh tail light
Spring washer
Vibration damper mount
Splashguard
Screw
Spacer
Screw
Washer
Splashguard (europe - australi ...
Abs system operating information
The response of the system is based on the analysis of the speed signals for
front and rear wheels; the system is
automatically deactivated if either of these signals is missing.
Note
In the event of the abs control unit detecting a fault in the abs
electronic management system, it activates ...
Draining the clutch hydraulic circuit
Warning
Clutch fluid will damage painted surfaces if spilled on them. It is
also very harmful if it comes into contact with the skin or
with the eyes; in the case of accidental contact, wash the affected area
thoroughly with plenty of running water.
Remove the dust cap to expose the bleed val ...