
Ducati Diavel Service Manual: Topping up the electrolyte
Warning
Before carrying out any operations on the battery, keep in mind the safety standards (sect.1 - 3, General safety rules).
The electrolyte in the battery is toxic and can cause burns if it comes into contact with the skin because it contains sulphuric acid. Wear protective clothing, a face-mask and goggles when adding electrolyte. If the liquid comes into contact with the skin, wash thoroughly with cold water. If it comes into contact with the eyes, wash thoroughly with water for 15 minutes and consult an ophthalmologist. In the event of accidental ingestion, drink large quantities of water or milk, and continue with milk of magnesia, beaten egg or vegetable oil. Do not allow sparks, flames, cigarettes or any other heat source to come near the battery, as it produces explosive gases. When recharging or using the battery indoors, make sure that the room is adequately ventilated. Do not inhale the gases produced during recharging. Keep out of reach of children.
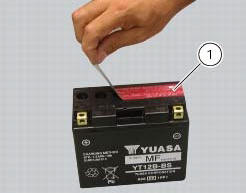
Place the battery on a flat surface. Remove the protective film (1).
Warning
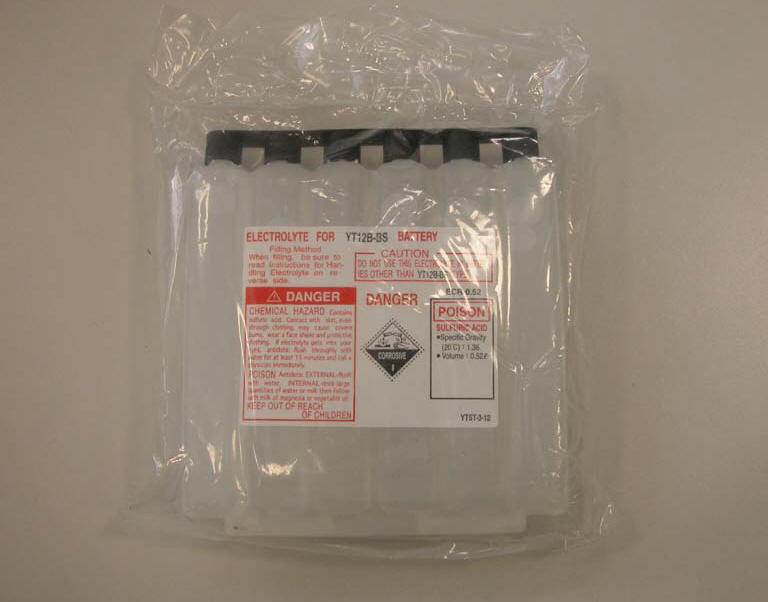
Make certain that the electrolyte is of the specific type for your battery.
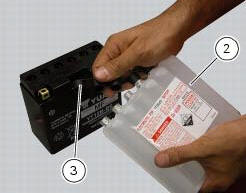
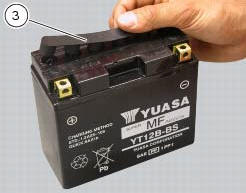
Remove the container with the electrolyte from the plastic bag. Remove the cap strip (3) from the container (2).
Important
Keep the cap strip (3) to hand because it will be used later as plugs for the battery cells.
Warning
Do not peel or perforate the sealed areas.
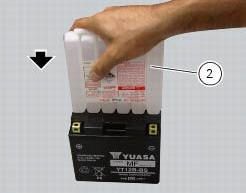
Place the electrolyte container (2) upside down. Align the six sealed elements with the six filler holes on the battery.
Push the container (2) downwards with sufficient force to break the seals and allow the liquid to flow out.
Note
Do not tilt the electrolyte container as this could interrupt the flow temporarily or even permanently.
Make certain that air bubbles emerge from all six filler holes. Leave the container in this position for at least twenty minutes.
If no bubbles emerge from one of the holes, tap gently on the bottom of the respective container.
Important
Never move the container away from the battery. Do not cut or puncture the liquid container.
Make sure that all the electrolyte has flowed out. Carefully extract the container (2) from the battery.
Fit the cap bar (3) -previously removed from the electrolyte container (2)- to the battery, ensure the caps plug off all filler holes.
3 -12 Ah batteries: leave to stand for at least 30 min.
12 Ah batteries: leave to stand for at least 1 hour.
Rest the cap strip on the filler holes without fixing it. Recharge the battery as described in the paragraph "recharging the battery".
Note
When using an automatic reduction battery charger, check that the charger current (ampere) is equal or higher than the value of standard charging system (std) indicated on the battery itself.
Press firmly downwards with both hands until the caps are firmly in place (do not use a hammer).
 Recharging the battery
Examine the label on the battery showing the check intervals in order to
determine when to test the voltage.
Charge the battery if the open circuit voltage is lower than 12.8 V. Leaving
the b ...
 Battery
Battery safety rules
Warning
Before carrying out any operations on the battery, keep in mind the
safety standards (sect. 1 - 3, General safety rules).
When under charge, batteries produce explo ...
Other materials:
Start procedure with pin code (no keys)
The motorcycle may be started without keys with a special procedure using the
dashboard and the switches on the
handlebar.
Note
This procedure is only possible if the pin code has been enabled
previously. For security reasons, the pin code is disabled
by default when the vehicle leaves the f ...
Recovery procedure in the event of hands free system fault
If the hands free system can no longer communicate with the other control
units over the can network (with the
dashboard or engine on), the following icon is shown on the tank dashboard:
The following image shows the icon appearing on the tank dashboard: this
indicates that the hands free sy ...
Fuel, lubricants and other fluids
Important
Do not use additives in fuel or lubricants.
Engine oil
A good quality engine oil has special properties. Use only a highly detergent
engine oil with certified se, sf or sg or
higher service ratings as marked on the container.
Viscosity
Sae 15w-50
The other viscosity grades ...