
Ducati Diavel Service Manual: Refitting the radiator
The reassembly procedure is the same for both radiators.
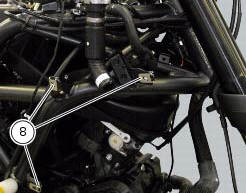
Check for the nuts with clips (8).
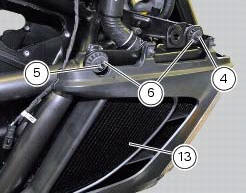
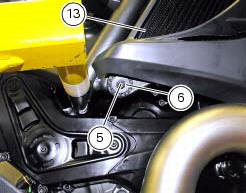
Refit the rh radiator (13) on the frame and tighten the screws (4) and (5) with the spacers (6) to a torque of 10 nm +/-10% (sect. 3 - 3, Frame torque settings).
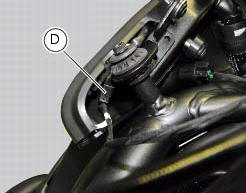
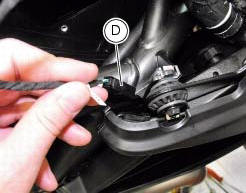
Connect the connections of wiring (d) to the front turn indicators.
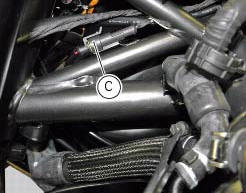
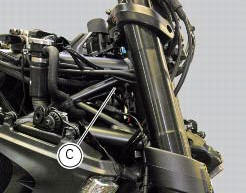
Reconnect the electro-fan wiring of the radiators to the main wiring (c).
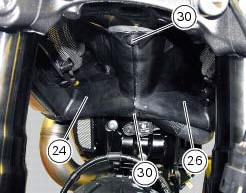
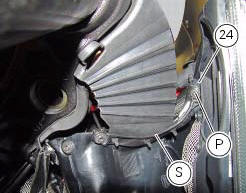
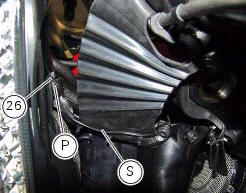
Once both radiators have been mounted, join the two internal air ducts (24) and (26) by tightening the screws (30) to a torque of 4 nm +/- 10% (sect. 3 - 3, Frame torque settings).
Fix supports (s) of the front splashguard to the air ducts (24) and (26) by tightening the screws (p) to a torque of 4 nm +/- 10% (sect. 3 - 3, Frame torque settings).
 Reassembling the water radiator unit
The procedure is the same for both radiators.
Check the presence of clips (1) at the positions of the external coolant
radiator cover (23).
If removed, fit the front turn indicator (32) on the ...
 Water pump
Screw
Washer
Circlip
Water pump outlet union
Bearing
bearing
Spacer
Aluminium gasket
Mechanical seal
Water pump impeller
Bush
Water pump cover assembly
Screw
Plug
Se ...
Other materials:
Lcd unit functions
Speedometer.
Gives road speed
Rev counter.
Indicates engine revs per minute.
Clock.
Water temperature indicator.
Indicates engine coolant temperature.
Important
Stop riding if the temperature reaches the maximum value, otherwise the
engine might be damaged.
...
Specific tools for the engine
88713.2011.Tool to lock crankshaft at top dead centre
88713.2676 .Wrench for tightening cylinder head nuts
88713.2103 Stand for cylinder head assembly
88765.1657 Timing check tool
88713.1821 Wrench for tightening timing belt tensioner pulley shafts
88713.2861 Camshaft oi ...
Overhaul of the connecting rods
Make the following dimensional checks on the connecting rods:
Clearance with gudgeon pin on assembly.
In the event of excessive wear (sect. 3 - 1.1, Crankshaft), replace the
connecting rod.
The small end bushing must be in good condition and firmly driven into its seat.
Check for para ...