
Ducati Diavel Service Manual: Disassembling the water radiator unit
The procedure is the same for both radiators.
Loosen the screws (15), (21) and (25) to remove the air duct (24) from the right radiator (13).

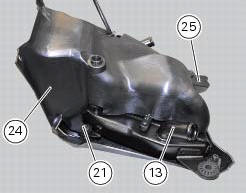
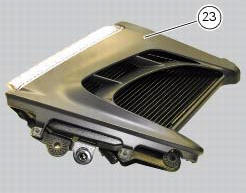
Undo the screws (12) and (14) to remove the half-fairing (23) from the radiator.

Radiator inspection
Visually inspect the oil cooler. If it shows signs of damage or leaks, the radiator must be renewed.
Check also that the air flow through the radiator core is not obstructed by leaves, insects, mud, etc.
Important
Excessive cooling temperatures can be caused by a partial obstruction of the radiator core. Carefully check the condition of the radiator core.
 Removing the water radiators
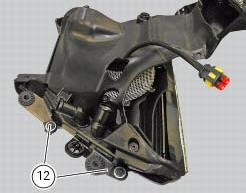
Loosen the screws (p) that retain the supports (s) of the front splashguard
to the air ducts (24) and (26).
Loosen the screws (30), to separate the two internal air ducts (24) and (26). ...
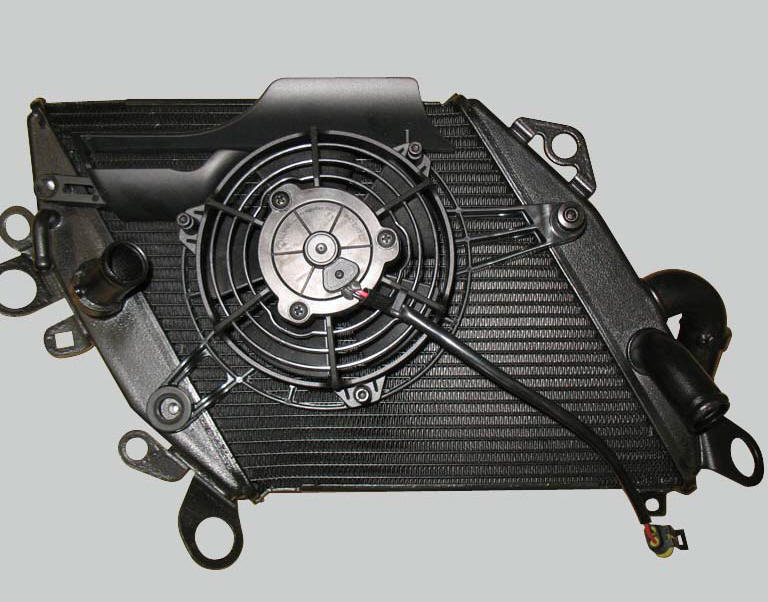
 Renewal of the cooling fan
Loosen the electro-fan retaining screws (15) and (17) and remove the
electro-fan (18) from the radiator.
Carry out the same procedure for the other radiator's electro-fan.
On refitting, positi ...
Other materials:
Adjusting the steering head bearings
Note
To adjust the steering bearing clearance, follow what is described in
sect. 4 - 3, Adjusting the steering head bearings.
If the problems found are not solved, check the wear of steering bearings (6)
and replace them, if necessary, as described
in paragraph "removal of the steering head c ...
Refitting the silencer
Position the silencer guard (41) and fix it by starting the screws (40).
Tighten the screws (40) to a torque of 8 nm +/- 10% (sect. 3 - 3, Frame torque
settings).
Insert the silencer (4) into the central exhaust pipe (26), and fix it to the
vehicle by starting the screw (1).
Hold the ...
Refitting the intake manifold and coolant union
Apply prescribed threadlocker to the fitting (12), start it with seal (24)
and tighten it to a torque of 2.5 Nm (min. 2 Nm -
max. 3 Nm) (sect. 3 - 3, Frame torque settings).
Install the pipe (b) and tighten the clamp (a) to the torque of 1 nm +/- 10%
(sect. 3 - 3, Engine torque settings).
...