
Ducati Diavel Service Manual: Overhaul of the crankcase halves
Carefully examine the engine crankcase halves.
Check that the surfaces of the crankcase halves are perfectly flat using a reference surface.
Check that the bearings (1) and (18), and the bushings (2) and (17) are in optimum conditions. Note that the main bearings must always be changed in pairs (refer to the procedure below in "main bearings").
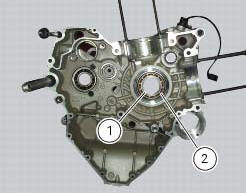
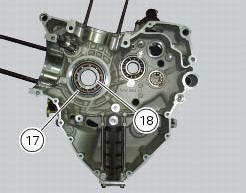
Note
When overhauling an engine it is good practice to renew all the crankcase half bearings.
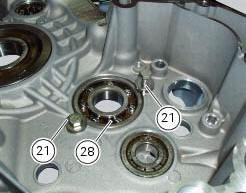
After having renewed the gearbox shaft bearings (28) and (9), secure them in the crankcase half with the spacers (21) and the retaining plate (10).
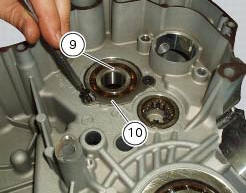
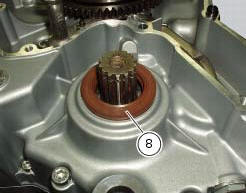
At each overhaul it is recommended to renew also the seal (8) on the outside of bearing (9).
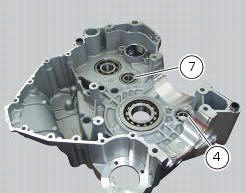
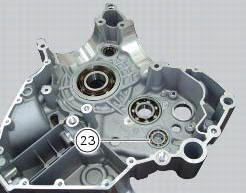
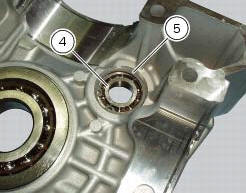
Renew the bearings (7) and (23) on the ends of the gearbox shafts and timing belt driveshaft bearings (4) and (15).

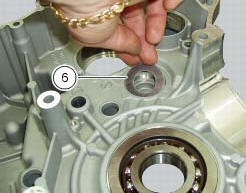
Take care not to lose the shim (6) interposed between the bearing (7) on the end of the gearbox primary shaft and the chain side crankcase half
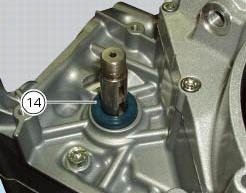
The seal (14) on the external side of the roller bearing (15) must be renewed at each engine overhaul.
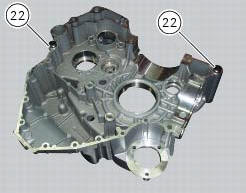
Check that the oilways are free of restrictions or clogging. Check the condition of locating bushes (22). If apparently distorted or loose in their seats, change them using proper tools. When the locating bushes (22) are hard to remove from casing, use a left-hand tap to force bushes out.
Important
The bushes (22) must always be renewed when they have been removed using the above procedure.
Remove the bearing (23), the circlip (5) and the roller bearing (4).
 Separation of the crankcase halves
Use two screwdrivers to remove the circlip (29) from the timing belt
driveshaft shaft (30) on the clutch-side crankcase
half.
Note
Take care to avoid scoring the surface of the shaft while re ...
 Main bearings
The main bearings have are of the angular contact type with offset inner
races so that the balls transmit loads from one
groove to the other along straight lines at an angle to the axis of the bear ...
Other materials:
Display background colour (automatic adjustment)
Instrument panel background colour is set automatically
according to exterior lighting conditions.
When sensor detects "poor lighting" (night), it switches to
black background mode; vice versa when a "significant"
lighting is detected (day), it switches to white background
...
Swingarm
Swingarm pivot
Washer
Special screw
Bush
Sealing ring
Roller bearing
Special screw
Rear swingarm
Spacer
Bearing
Spacer
Spacer
Hose clip
Pin
Chain slider (lower)
Washer
O-ring
Calliper mounting bracket
Circlip
Spacer
Inner ring
Hub
Cable grommet
Ch ...
Engine on/off
Warning
Before starting the engine, become familiar with the
controls you will need to use when riding (page 99).
Warning
Never start or run the engine indoors. Exhaust gases
are toxic and may lead to loss of consciousness or even
death within a short time.
In the presence of the active or ...