
Ducati Diavel Service Manual: Removing the water radiators

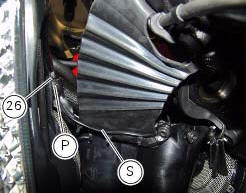
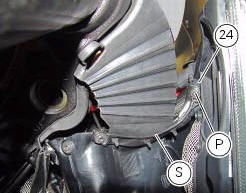
Loosen the screws (p) that retain the supports (s) of the front splashguard to the air ducts (24) and (26).
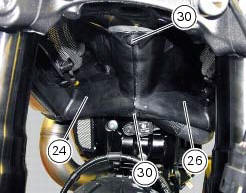
Loosen the screws (30), to separate the two internal air ducts (24) and (26).
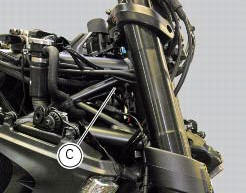
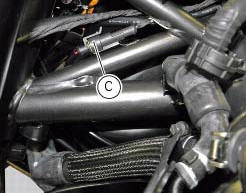
Disconnect the wiring connectors of the main wiring loom (c) from both fans.
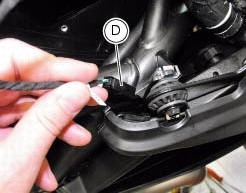
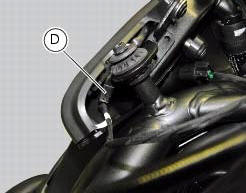
Disconnect the connections of wiring (d) from the front turn indicators.
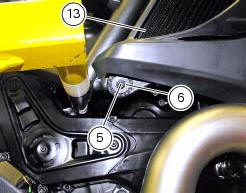
Loosen the screws (4) and (5) with spacer (6) securing the water radiator to the frame.
Remove the rh radiator (13) from the frame.
Follow the same procedure for the left radiator.

 Water radiators
Clip nut
Spacer
Vibration damper mount
Screw
Screw
Spacer
Vibration damper mount
Clip nut
Bush
Spacer
Rear sprocket
Screw
Water radiator (right)
Screw
Screw
Air de ...
 Disassembling the water radiator unit
The procedure is the same for both radiators.
Loosen the screws (15), (21) and (25) to remove the air duct (24) from the right
radiator (13).
Undo the screws (12) and (14) to remove the ...
Other materials:
Indicator speed avg - average speed
This function shows the average speed of the motorcycle.
The calculation is made considering the distance and time travelled since the
last trip 1 reset. When trip 1 is reset, the
value is set to zero and the first available value is shown on the display 10
seconds after the reset. Dashes "- ...
Adjusting the clutch lever and front brake lever
The clutch lever (1) is fitted with a span adjuster (2) which serves to alter
the distance of the lever from the handlebar.
The lever distance can be adjusted through 10 clicks of the dial (2). Turn
clockwise to increase lever distance. Turn the
adjuster counter clockwise to decrease lever d ...
Overhaul of cylinder head components
Cylinder heads
Remove any carbon deposits from the combustion chamber and its ducts.
Remove any scale from the coolant ducts.
Check for cracking and inspect the sealing surfaces for scoring, ridges or other
damage.
Check that the cylinder barrel mating surfaces of the cylinder head are ...