
Ducati Diavel Owners Manual: Key-on/key-off using the key on the hands free lock with the passive key
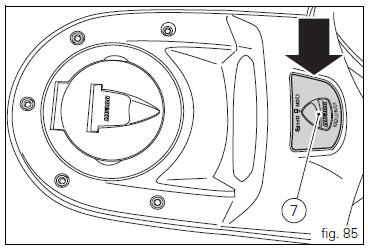
Key-on can be performed by pressing the button (7) on the hands free lock and with the presence of the passive key (4, fig. 77).
 Note
Note
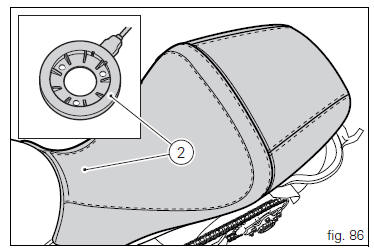
The passive key (4, fig. 77) Has a range of a few cm, therefore the key (4, fig. 77) Must be positioned near the antenna (2). Remove the seat (see "removal of the seat" on page 119) to access the antenna (2).
Key-off can be performed by pressing the button (7) on the hands free lock (1, fig. 77), Also without the key (4, fig. 77).
 Key-on/key-off using the red key on the handlebar with the passive key
A key-on can be performed by pressing the red button (6) on
the handlebar in the hands free on/off position and in
the presence of the passive key (4, fig. 77).
Note
The passive key (4, fig. 77) ...
 Key-on/key-off using the pin code (immobilizer release)
Key-on can be performed by pressing the button (7) on the
hands free lock (1, fig. 77) Without the presence of the keys
(3, fig. 77) And (4, fig. 77) And entering the pin code on the
dashboard.
...
Other materials:
Refitting the front forks
Refit the fork legs, positioning them at the height shown in the figure
relative to the upper surface of the bottom yoke.
Warning
The difference in height between the two fork legs must be no
greater than 0.1 Mm.
Position the fork legs (5) and (6) on the yoke base (4) and on the steering ...
Engaged gear indicator
This function displays the gears (1, fig. 25).
The instrument panel receives information and indicates the
engaged gear or "n" for neutral.
Note
In the case of a gear sensor "error", a dash "-" (not
flashing) will be displayed.
...
Check the engine oil pressure
Note
The on-screen icons used during this procedure are explained in a table at
the end of this section.
To measure the pressure of the lubrication circuit, use the engine oil pressure
test point (19) as described below.
Disconnect the wiring connector (f) of pressure switch (1) and rem ...