
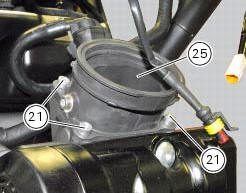
Ducati Diavel Service Manual: Removal of the intake manifold and coolant union
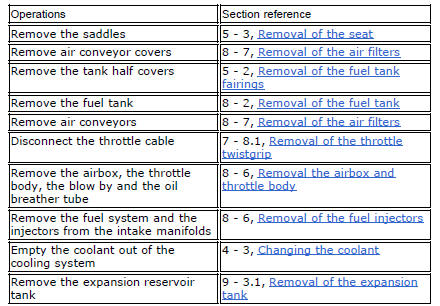
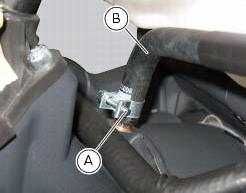
Loosen the clips (f) and remove the hoses (t).
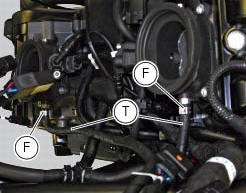
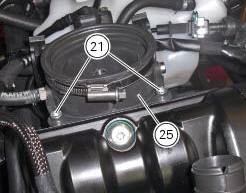
Remove the manifolds (25) undoing the screws (21).
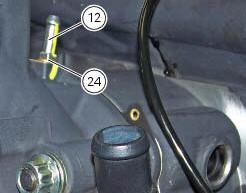
Loosen the clamp (a) and remove the hose (b). Remove the union (12) and recover the seal (24).
 Refitting the camshafts
If the stud bolts (2) were removed, apply the recommended threadlocker to the
short end of the stud bolts (2), i.E. The
end that is to be screwed into the cylinder head. Tighten the stud bolts (2) ...
 Refitting the intake manifold and coolant union
Apply prescribed threadlocker to the fitting (12), start it with seal (24)
and tighten it to a torque of 2.5 Nm (min. 2 Nm -
max. 3 Nm) (sect. 3 - 3, Frame torque settings).
Install the pipe (b) ...
Other materials:
Checking valve clearances
To check the valves clearance, it is necessary to have access to the cylinder
head covers and then remove the
components listed below.
Unscrew the two fixing screws (1) of the cover (2) according to the
crankshaft.
Fit the tool handgrip 88713.0123 In the holes of the generator cover t ...
Refitting the engine
Refitting is the reverse of removal.
Important
Apply recommended grease and tighten the special screws (6) to a torque of
60 nm +/- 5% (sect. 3 - 3, Frame torque
settings).
Tighten the nuts (3) to a torque of 48 nm +/- 5% (sect. 3 - 3, Frame torque
settings).
Warning
For the assembly seque ...
Refitting the fuel tank fairings
Make sure that the following components are fitted on the tank fairing (22):
Spacers (18);
Seals (20).
Fit the clips (19) to the central cover (22) at the positions shown,
inserting the tabs (h) into the slots (l).
Apply threadlocker to the screws (14).
Place the tank fairing (22) ...