
Ducati Diavel Service Manual: Removal of the rear shock absorber

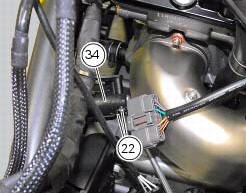
Loosen the screws (22) and remove the assembly (34) from the frame.
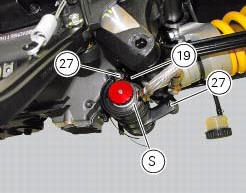
Loosen the screws (27) and remove the tank unit (s) of the shock absorber from the support (19).
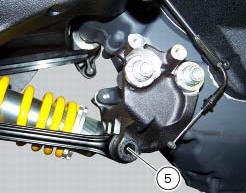
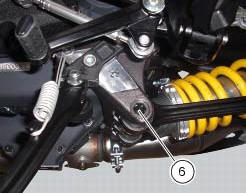
Hold the lh bush (6) and loosen the rh bush (5) to release the front side of the shock absorber assembly.
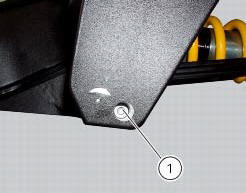
Undo the special screw (1) and remove the shock absorber assembly from the vehicle.
Overhauling the rear shock absorber
Important
Contact an authorised sachs service centre in case of problems with the shock absorber.
 Rear shock absorber assembly
Special screw
Screw
Nut
Grub screw
Bush (right)
Bush (left)
Screw
Sealing ring
Roller bearing
Linkage (left)
Shock absorber (rear)
Linkage (right)
Spacer
Special screw ...
 Disassembly of rear shock absorber - rocker arm - linkage assembly
Undo the screw (15) and remove the rear shock absorber (11) from the rocker
arm (18).
Undo
Undo the screw (14) and the nut (21) and remove the linkages (10) and (12)
from the rocker arm (1 ...
Other materials:
Riding style function (riding style change)
This function changes the motorcycle riding style.
Each riding style is associated with a different intervention level of the
traction control (dtc - ducati traction control) and
different engine power and output.
To change the motorcycle riding mode, press the reset button once
(3) and th ...
Inspection of the gear selector forks
Visually inspect the gear selector forks. Bent forks must be renewed as they
may lead to difficulties in gear changing or
may suddenly disengage when under load.
Use a feeler gauge to check the clearance of each fork in its gear groove.
If the service limit has been exceeded, check whether ...
Renewal of the cooling fan
Loosen the electro-fan retaining screws (15) and (17) and remove the
electro-fan (18) from the radiator.
Carry out the same procedure for the other radiator's electro-fan.
On refitting, position the coolant radiator fan (18) as shown on the fan support
(16), so that the three fan holes mat ...