
Ducati Diavel Service Manual: Bleeding of the abs hydraulic system
If some "sponginess" is detected on the brake control, due to air bubbles in the system, bleed the system, as indicated in sect. 4 - 3, Changing the brake fluid.
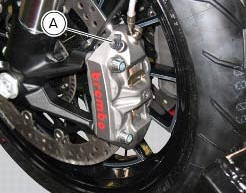
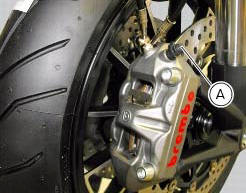
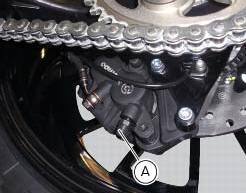
Before bleeding a brake pump, move back the calliper pistons, as indicated in (sect. 4 - 3, Changing the brake fluid) to Drain in the pump the air collected near the abs control unit purge must be carried out by means of the corresponding joints (a) placed near the callipers and the brake pumps.
Important
Do not undo the fixing screws of the joints of the pipes on the abs hydraulic control unit, unless control unit replacement is necessary.
Important
If the abs control unit is replaced, this must be supplied with secondary circuit already full of fluid; the control unit must be fitted and the system filled and bleeded as a traditional system.
 Adjusting of the air-gap phonic wheel sensor
(For front as well as rear sensor) in each case of maintenance that foresees:
Replacement or refitting of the wheel
Replacement or refitting of the phonic wheel (1) or (2)
Replacement or refit ...
 Handlebar unit
...
Other materials:
Removing of the front sprocket
Undo the screws (11) and remove the chain cover (10).
Loosen the chain (sect. 4 - 3, Adjusting the chain tension).
Remove the chain with the tool code 88713.1344.
The tool is composed of a holder (a), punch (b), body (c) and two wrenches (d)
and (e).
Fit the link to be opened into th ...
Gearbox shafts
Shim, thickness 1
Gearbox primary shaft
Shim, thickness 0.5
Needle roller bearing
5Th speed driving gear
Splined washer, thickness 0.5
Circlip
3Rd- 4th speed driving gear
6Th speed driving gear
2Nd speed driving gear
Shim, thickness 1.8
Splined washer, thickness 0.5
Sp ...
Removal of the oil pump
Undo and remove the screws (9) and (10) securing the pump assembly.
Remove the oil pump assembly (1) and extract the o-rings (2) and (4) from the
crankcase half together with two locating
bushes (15).
...