
Ducati Diavel Service Manual: Inspection of the gear selector forks
Visually inspect the gear selector forks. Bent forks must be renewed as they may lead to difficulties in gear changing or may suddenly disengage when under load.
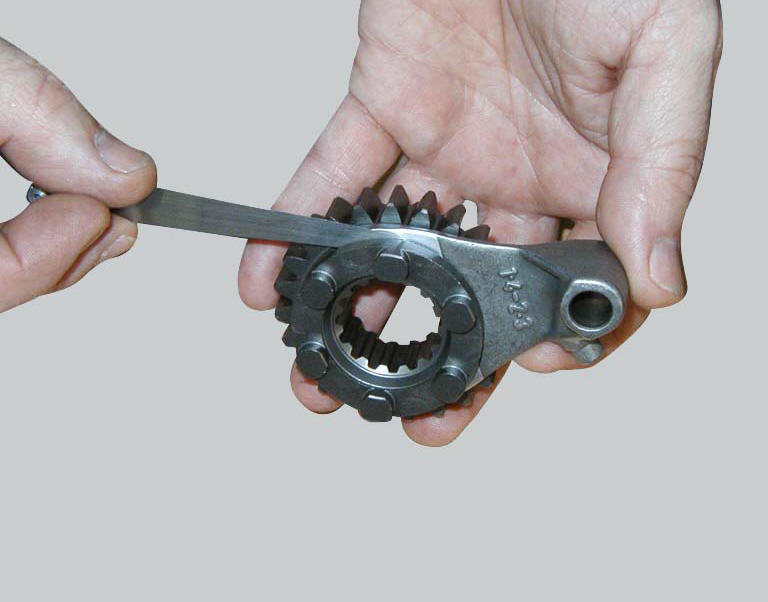
Use a feeler gauge to check the clearance of each fork in its gear groove.
If the service limit has been exceeded, check whether or not it is necessary to replace the gear or the fork by referring to the limits specified for each part (sect. 3 - 1.1, Gearbox).
 Overhaul of the gearbox
Check the condition of the front coupling dogs of the gears. They must be in
perfect condition and with no sign of wear on
the edges of the teeth.
The idler gears must rotate freely on their sha ...
 Inspection of the gear selector drum
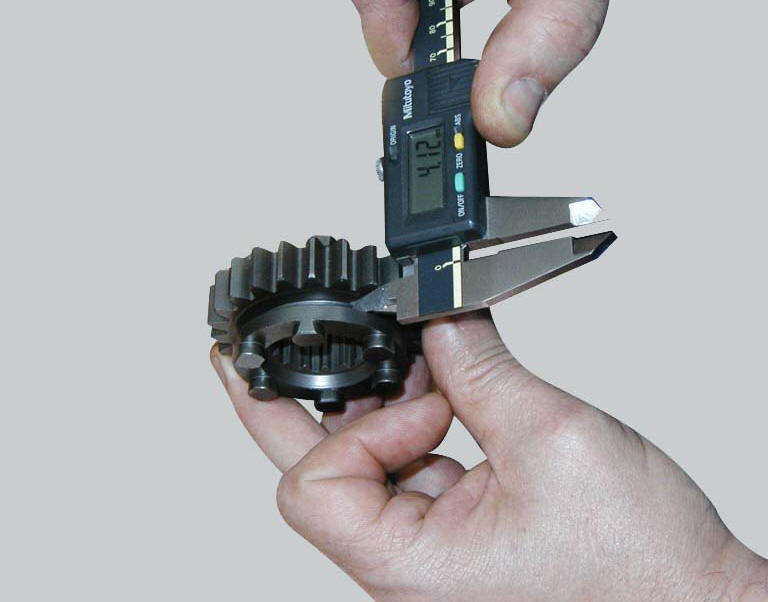
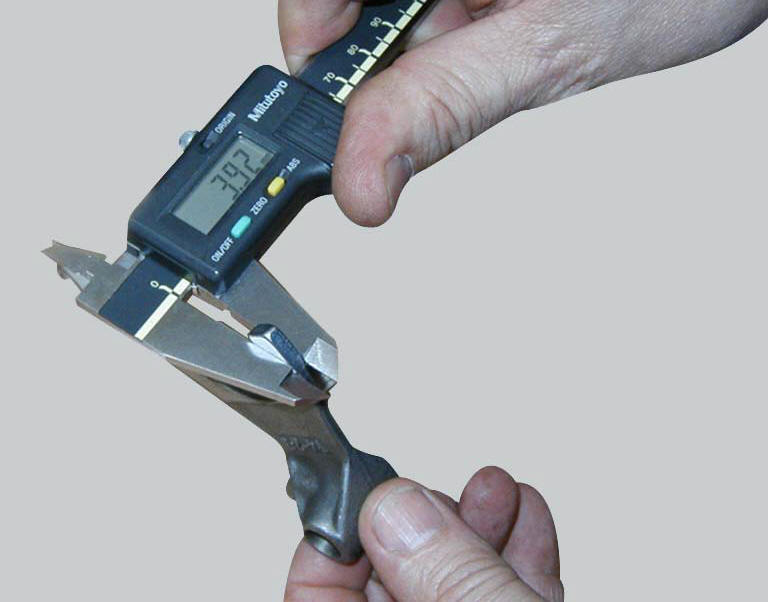
Use a gauge to measure the clearance between fork pin and the slot on the
selector drum.
If the service limit is exceeded, determine which part must be replaced by
comparing these dimensions wi ...
Other materials:
Refitting the hands free
Reassembly is a reversal of the removal procedure: in particular apply
prescribed threadlocker to screws (2) and tighten
them to a torque of 20 nm +/- 10% (sect. 3 - 3, Frame torque settings).
If the hands free button has been previously removed, when refitting it insert
the spring (6) on pi ...
Cleaning and replacing the spark plugs
Spark plugs are essential to smooth engine running and
should be checked at regular intervals.
The condition of the spark plugs provides a good indication of
how well the engine is running.
Have the spark plugs inspected or replaced at a ducati dealer
or authorised service centre; they will ...
Checking brake and clutch fluid level
The levels should not fall below the min marks on the
respective reservoirs.
If the level is too low, air can get into the circuit, thus
impairing the efficiency of the system.
Brake and clutch fluid must be topped up and changed at the
intervals specified in the scheduled maintenance table ...